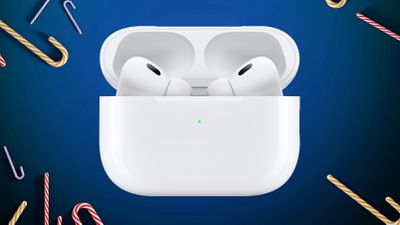
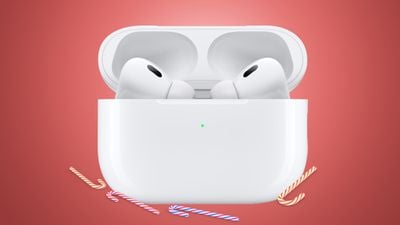
Earlier this weekend, Woot introduced a new all-time low price on the second-generation AirPods Pro, and that deal quickly sold out. Today, Amazon has the AirPods Pro 2 at $199.99, down from $249.00. This is just $2 higher than Woot's sale and stock appears more stable, so it's a great chance to get the earbuds at nearly their best-ever price.
Note: MacRumors is an affiliate partner with some of these vendors. When you click a link and make a purchase, we may receive a small payment, which helps us keep the site running.
As of writing, the AirPods Pro 2 have an estimated delivery between November 23 and November 25 for most residences in the United States. They're shipped and sold directly from Amazon as well, and this deal is automatically applied so you won't need any discount code.
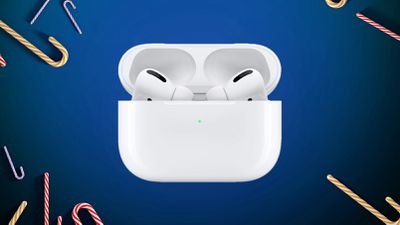
Those shopping for the first-generation AirPods Pro can get the earbuds for $159.99 on Verizon, which is a record low price. If you need an in-depth breakdown on the differences between the AirPods Pro 1 and AirPods Pro 2, check out our Buyer's Guide detailing all of the similarities and differences between each model.
You can find all the Apple Black Friday Deals currently available in our dedicated post. For everything else, we're keeping track of all of the season's best Apple-related deals in our Black Friday roundup, so be sure to check back throughout the month for an updated list of all the most notable discounts you'll find for Black Friday 2022.
Even though we're still a few days out from Black Friday, early sales are in full swing this weekend. Today we're tracking an all-time low price on the AirTag 4-Pack, multiple discounts across the official iPhone 14 and iPhone 14 Pro MagSafe case lineup, and solid deals on Apple's MagSafe Charger accessories.
Note: MacRumors is an affiliate partner with some of these vendors. When you click a link and make a purchase, we may receive a small payment, which helps us keep the site running.
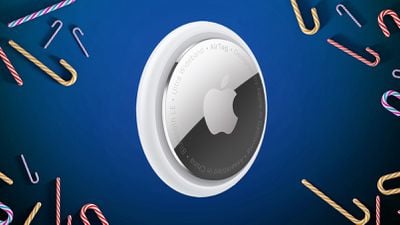
Starting with the AirTag 4-Pack, Amazon has the tracking accessory multi-pack for $74.99, down from $99.00. This is a new all-time low price on this device, and you can get a solo AirTag for $22.49, down from $29.00.
Update: We updated this section with a new low price on the AirTag 4-Pack, and Amazon's introduction of a new deal on the solo AirTag.
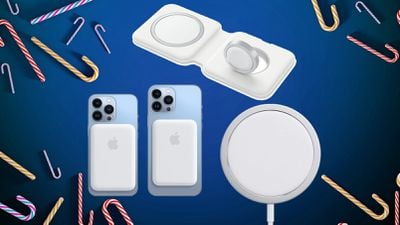
For MagSafe accessories, we're seeing sales from both Amazon and Verizon. In total, Verizon has the best sales, but Amazon is either matching these prices or providing deals that get very close to Verizon's all-time low offerings.
At Verizon, you can get the MagSafe Charger for $29.99, down from $39.00. The MagSafe Battery Pack is down to $74.24, from $99.00, and the MagSafe Duo Charger is down to $96.74, from $129.00.
At Amazon, you can get the MagSafe Charger for $29.99, the MagSafe Battery Pack for $74.99, and the MagSafe Duo Charger for $97.49. These are all either matching or nearly matching Verizon's deals.
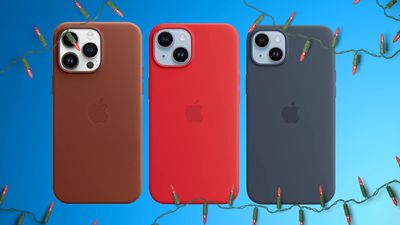
Lastly, Amazon also has quite a few discounts on Apple's official MagSafe cases for the iPhone 14 and iPhone 14 Pro. You can find every case listed below by model, and many are seeing multiple colors hitting record low prices. There's also the MagSafe Leather Wallet with Find My support for $44.99, down from $59.00.
You can find all the Apple Black Friday Deals currently available in our dedicated post. For everything else, we're keeping track of all of the season's best Apple-related deals in our Black Friday roundup, so be sure to check back throughout the month for an updated list of all the most notable discounts you'll find for Black Friday 2022.
Schiller often used his account to promote new Apple products, services, software, and initiatives and interact with customers. As noted on Twitter by Bloomberg's Mark Gurman, however, Schiller's account no longer exists. The account had over 200,000 followers and was created in November 2008 according to a web archive of the account dated November 4.
Yesterday, Twitter CEO Elon Musk announced that former President Trump's account would be reinstated on the platform following its suspension in January 2021. In a recent interview, Apple's CEO Tim Cook commented about the future of Twitter and the social media platform's relationship with Apple. During the interview, Cook said he remained hopeful Twitter would uphold its moderation standard under the new leadership.
Note: Due to the political or social nature of the discussion regarding this topic, the discussion thread is located in our Political News forum. All forum members and site visitors are welcome to read and follow the thread, but posting is limited to forum members with at least 100 posts.
We're very close to Black Friday, and as more and more sales pick up, today we're tracking a new discount event being held at Sonos. For its Black Friday offerings, you can get 20 percent off select products on the Sonos website through November 28.
Note: MacRumors is an affiliate partner with Sonos. When you click a link and make a purchase, we may receive a small payment, which helps us keep the site running.
Specifically, the sale has six of Sonos' audio devices at 20 percent off, including two soundbars, a subwoofer, and three speakers. All of these sales can be found on the Sonos website and you don't need any coupon codes to see the discounts.
Anyone looking to purchase the Sonos Move should note that this accessory will be discounted by 20 percent on Cyber Monday. It'll be priced at $319, down from $399 for that day only, so be sure to return to the Sonos sale on Cyber Monday if you're interested.
You can find all the Apple Black Friday Deals currently available in our dedicated post. For everything else, we're keeping track of all of the season's best Apple-related deals in our Black Friday roundup, so be sure to check back throughout the month for an updated list of all the most notable discounts you'll find for Black Friday 2022.
Last week was jam-packed with early Black Friday deals, and now that the shopping holiday is right around the corner, we're going back through all of the best sales you might have missed over the past week and updating as prices change and new deals arrive. As with all holiday shopping, there's no guarantee that better prices won't come around later in the season, but if you want to shop early, these are the best deals you will find online.
Note: MacRumors is an affiliate partner with some of these vendors. When you click a link and make a purchase, we may receive a small payment, which helps us keep the site running.
Specifically, in this article we're sharing all of the Apple products that currently have all-time low prices, or discounts that are at least very close to their record-low prices. Every deal shared below is available to purchase right now, and you can use the links below to jump directly to the section you're shopping for today.
Verizon this week emerged with the first major HomePod mini discount of the holiday season, offering the smart speaker for $79.99, down from $99.99. As of Thanksgiving day, three colors are left at this price, so if you're interested be sure to snag the deal while stock remains. This is one of the best prices of the year and overall a second-best price.
Apple TV 4K (2021)
What's the deal? Take $99 off the 2021 Apple TV 4K
The closer we get to Black Friday, the better the deals on the previous-generation Apple TV 4K. On Amazon, you can get the 64GB 2021 Apple TV 4K for $99.99, which is an all-time low price. The retailer had the 32GB for just $79.99 earlier in the week, but that sale sold out and we aren't sure whether or not it will return.
AirPods
AirPods Pro 2 (2022)
What's the deal? Take $49 off the new AirPods Pro 2
Amazon is joining in on the AirPods Pro 2 discounts this season with the earbuds priced at $199.99. Although Woot's sale had the earbuds for $2 cheaper, it sold out quickly and isn't expected to come back soon, making Amazon's sale a great opportunity to get the accessory at nearly their all-time low price.
This item is currently out of stock but will hopefully return later
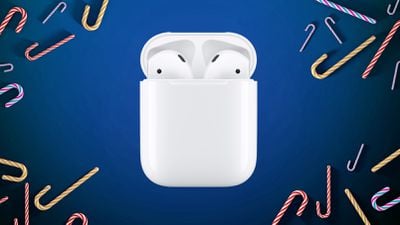
AirPods 2 remain a solid entry-level option for most users, and at $79.00 on Amazon they're even easier to recommend. In total, this is the best price we've ever seen on this model.
AirPods Pro (2021)
What's the deal? Take $90 off the 2021 AirPods Pro
As stock dwindles on the previous-generation AirPods Pro, it's been rarer and rarer to see steep discounts. This week, however, Verizon has both stock and an all-time low price on the 2021 AirPods Pro at $159.99. Amazon is now also matching this deal.
The previous-generation iPad just hit its best-ever price at $269.99 for 64GB Wi-Fi models, and it's available in both Silver and Space Gray. If you don't need the latest model with all of the major design changes, this could be a great entry-level option for holiday gifting.
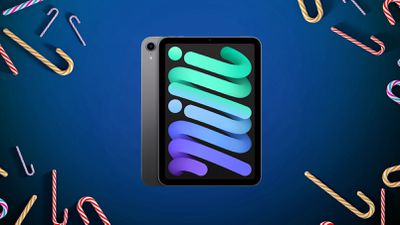
Notable iPad discounts continue this week with the best price around on Apple's iPad mini 6, available for $399.99 (64GB Wi-Fi) in two colors on Amazon. That's $99 off, and you'll also find the same markdowns on the 256GB Wi-Fi models, and many cellular models as well.
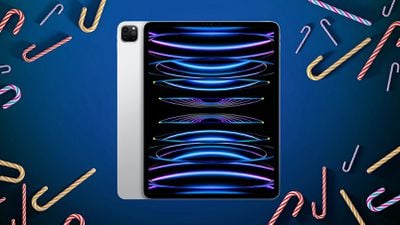
12.9-Inch iPad Pro (2022)
What's the deal? Take $100 off the new 12.9-inch iPad Pro
If you want a bigger display, there is also a nice discount on the 128GB Wi-Fi 12.9-inch iPad Pro on Amazon. It's priced at $999.00, down from $1,099.00. This is a new low price and one of the only 12.9-inch iPad Pro models from 2022 reaching as much as $100 off on Amazon.
Mac
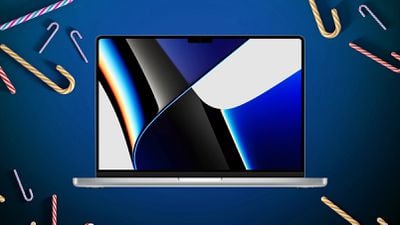
MacBook Pro
What's the deal? Take up to $499 off the 14-inch and 16-inch MacBook Pro
Massive discounts continue to hit Apple's 2021 14-inch MacBook Pro lineup, with as much as $500 off these notebooks on Amazon. The retailer is also now offering 16-inch models at even steeper discounts of up to $499 for the lowest prices we've ever tracked on these models.
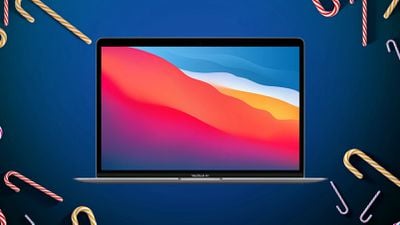
M1 MacBook Air (2020)
What's the deal? Take up to $200 off the 2020 M1 MacBook Air
Apple's M1 MacBook Air is still being offered by the company as a cheaper alternative to the new M2 MacBook Air, and Amazon is sweetening the deal by dropping the price by $200 for Black Friday. The 256GB model is just $799.00 right now in all three colors.
M2 MacBook Air (2022)
What's the deal? Take $150 off the 2022 M2 MacBook Air
For the latest models of the MacBook Air, Amazon has $150 off the 256GB notebook, priced at $1,049.00. This is an all-time low price and it's available in all four colors.
27-Inch iMac (2020)
What's the deal? Take $599 off the 2020 27-inch iMac
Apple's 27-inch iMacs are hard to recommend nowadays due to their inclusion of Intel chips instead of the new Apple silicon. However, if you're looking to find a Mac for basic day-to-day tasks and have no need for the latest models, there are quite steep discounts to be found this Black Friday on Amazon.
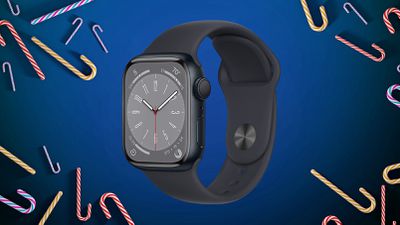
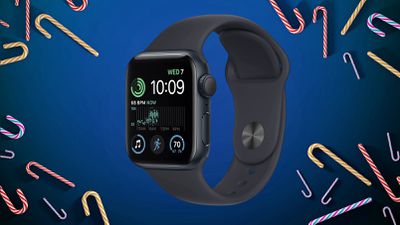
Amazon has quite a few $50 discounts on the new Apple Watch Series 8, starting at $349.00 for 41mm GPS models and increasing to $379.00 for 45mm GPS models. For cellular devices, you'll find prices start at $449.00 for 41mm cellular models and increase to $479.00 for 45mm cellular models, which are also $50 markdowns.
SE (2022)
What's the deal? Take up to $40 off the Apple Watch SE
Similar to Series 8 devices, the new Apple Watch SE has savings across its lineup on Amazon. Prices start at $229.00 for 40mm GPS ($20 off) and raise to $239.00 for 44mm GPS ($39 off, a new all-time low). Cellular prices start at $279.00 for 40mm cellular and raise to $309.00 for 44mm cellular, which are both $20 discounts.
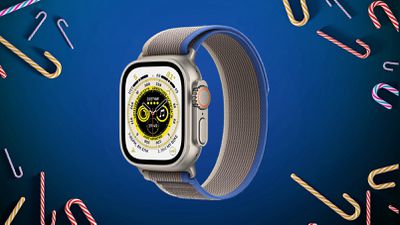
Ultra
What's the deal? Take $60 off the Apple Watch Ultra
Black Friday deals are finally here for the Apple Watch Ultra, which has seen its first major sales this week. You can get numerous configurations for $739.00, which is $60 off and a new best-ever price.
Accessories
MagSafe Chargers
What's the deal? Take 25% off the Apple MagSafe accessories
Verizon has been one of the only reliable sources of discounts on Apple's official MagSafe accessory line, and this fact remains true as we head into Black Friday. However, Amazon has recently jumped in on the sales and has the MagSafe Charger for $29.99, down from $39.00, and the MagSafe Duo Charger for $97.49, down from $129.00.
At Verizon, you can get the MagSafe Charger for $29.99, down from $39.00. The MagSafe Duo Charger is down to $96.74, from $129.00; and the MagSafe Battery Pack is down to $74.24, from $99.00.
Apple's AirTag 4-Pack hit an all-time low price of $74.99 on Amazon yesterday, down from $99.00. The price has since risen to $79.99, which remains a very solid deal. Deals on any version of the AirTag have been very rare in 2022, making this a great time to buy the tracking accessory in early holiday shopping. You can also get a solo AirTag for $24.99, down from $29.00. The 1-pack was as low as $22.48 earlier, but the current price is still a good one.
Amazon has the Apple Pencil 2 for $89.00 this Black Friday, down from $129.00. Compared to previous sales, this is an all-time low price on the accessory and as of now only Amazon has the deal.
iPhone
For iPhone deals, we're tracking numerous discounts across the major carriers, so for this section we'll break things up by carriers instead of by products. Just like the previous deals, all of these are available to purchase right now, so you don't have to wait until Black Friday to shop.
AT&T
AT&T is offering up to $800 off the iPhone 14 Pro and iPhone 14 Pro Max with eligible trade-in and purchase on a qualifying installment agreement. You'll get up to $800 in bill credits with trade-in value of $130 or higher, and up to $350 in bill credits with trade-in value of $35 to $129.
For Apple Watch deals, if you buy an Apple Watch you'll get the new Apple Watch SE at no extra cost. Both must be purchased on qualifying installment plans and you'll have to add at least one new line, then you'll get up to $330 in bill credits towards the second eligible Apple Watch.
Verizon
Verizon has the iPhone 14 Pro at up to $1,000 off when you trade in your old smartphone on select Verizon Unlimited plans. You'll even get an extra $200 when you switch from a different carrier to Verizon.
If you're buying an iPhone at Verizon, you can get a combo deal with an iPad as well. The carrier has iPads for as low as $8 per month when buying a new line and 5G iPhone at the same time, and it's only available online.
Verizon-owned carrier Visible is offering gift cards worth up to $250 when purchasing select devices through the carrier. You can also get a pair of Beats Studio Buds when buying a new iPhone 14 or 14 Pro model.
Mint Mobile is offering three months of premium wireless service for free when you buy any three-month plan. Additionally, you can get six months of service for free when you buy a six-month plan and a new phone through the carrier.
We're keeping track of all of the season's best Apple-related deals in our Black Friday roundup, so be sure to check back throughout the month for an updated list of all the most notable discounts you'll find for Black Friday 2022.
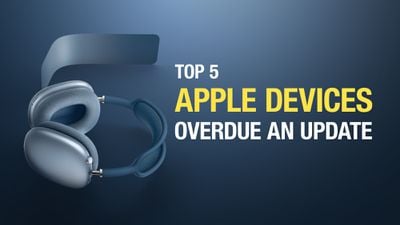
Several Apple devices are now over 18 months old, and with new hardware that could bring valuable improvements to them on the horizon, much of it already existing in other devices, there are five important products that seem to be overdue an update.
While some devices like the Pro Display XDR and HomePod mini are arguably also due an update, there are at least five main Apple devices that appear to be overdue a refresh – where a new model could yield substantial improvements. Likewise, as time goes by, it becomes increasingly difficult for Apple to justify leaving these devices in its product lineup without a hardware update.
Be sure to refer to the MacRumors Buyer's Guide for constant updates on the age and status of all Apple's released products, as well as when updates can reasonably be expected on the basis of when new models came out in previous years.
5. iMac
Current model released April 2021 (one year and seven months old).
Though there is some contention around whether Apple will reintroduce a larger iMac model, the current model with a 24-inch display features the M1 chip – meaning that it is outdated compared to the 13-inch MacBook Pro, redesigned MacBook Air, and iPad Pro. Apple announced the M2 chip in early June this year at WWDC, and since three different devices now contain the chip, the iMac is ripe for a chip upgrade.
Yet reports from Bloomberg's Mark Gurman suggest that an iMac with the M2 chip is not on the horizon. Following the M2 series of Macs, Gurman said a new iMac will be among the first M3 series of Macs, which will include an updated 13-inch MacBook Air, an all-new 15-inch MacBook Air, and potentially a new 12-inch notebook that is "still in early development."
The M3 chip is expected to be built on TSMC's 3nm technology, unlike the M1 and M2, which are built using a 5nm process. The more advanced manufacturing process is expected to bring significant performance and efficiency improvements.
The device is expected to be the successor to the current M1 iMac and may not launch until late 2023 at the earliest, according to Gurman, meaning that it may yet be some time before a new iMac emerges. It is not clear why Apple would exclude the iMac from the M2 chip and wait until the M3 chip is available, especially since this means that the current M1 model would be around for a considerable amount of time.
4. AirPods Max
Current model released December 2020 (one year and 11 months old).
Launched almost two years ago, the AirPods Max are the oldest AirPods still in Apple's product lineup. Despite being the most expensive AirPods at $549, the AirPods Max miss out on a large number of features that came to the second-generation AirPods Pro earlier this year.
With the H2 chips, significantly improved Active Noise Cancellation, Bluetooth 5.3 connectivity, Adaptive Transparency, skin-detect sensors, the U1 chip, and Precision Finding, there are a plethora of notable features that are yet to come to the AirPods Max. The headphones could also benefit from a refreshed selection of color options, MagSafe or USB-C charging, Conversation Boost, and sweat and water resistance.
The status of the next-generation AirPods Max is not clear at the present time. In May 2021, Gurman said that Apple was not actively working on second-generation AirPods Max, but it is not known if this is still the case. Seeing as Apple seems to launch one new AirPods product per year, the AirPods Max could be next up for a refresh.
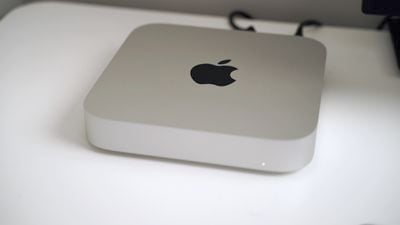
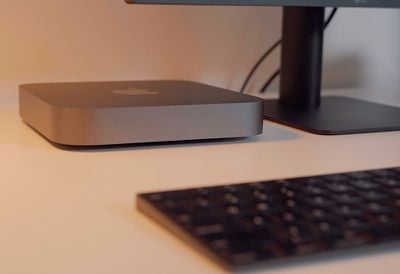
3. Entry-Level Mac Mini
Current model released November 2020 (two years old).
The M1 Mac mini is the oldest latest-generation Apple silicon Mac, and, much like the 24-inch iMac, it could benefit from an upgrade to the M2 chip.
Even though adding an M2 chip to the Mac mini would presumably require limited internal changes, Apple has thus far neglected to do so. Reports earlier this year suggested that Apple originally "had plans" to introduce new Mac mini models in 2022, but these arrangements were "probably scrapped" in favor of the all-new Mac Studio. A new Mac mini with the M2 chip is purportedly still in the works for launch sometime in 2023.
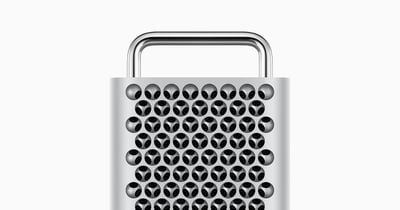
2. Mac Pro
Current model released December 2019 (two years and 11 months old).
The Mac Pro is one of the last Intel-based Mac models still on sale and the only remaining Mac product line with no Apple silicon chip options. An all-new model that finally brings Apple silicon to the company's top-tier Mac aimed professionals has now been anticipated for over two years. At its "Peek Performance" event earlier this year, Apple even directly teased the launch of the Apple silicon Mac Pro, saying "that's for another day."
Previously, reports about a smaller Mac Pro model placed somewhere between the Mac mini and the Mac Pro made it difficult to know what to expect from the future of the high-end Mac Pro line, but it is now clear many of these rumors related to the Mac Studio, somewhat clarifying what can be expected from the next-generation Mac Pro.
Multiple reports from Bloomberg's Mark Gurman about the Apple silicon Mac Pro's chip options and specifications provide a fairly straightforward picture of what to expect from the new flagship Mac. According to Gurman, users will reportedly be able to configure the new Mac Pro with "M2 Ultra" and "M2 Extreme" chip options.
Yet beyond its basic specifications, little is currently known about the device's design, ports, performance, and potential for modularity and customization, in real terms. Apple is expected to introduce the Apple silicon Mac Pro next year, and it could come alongside a "Pro" version of the Studio Display with a mini-LED panel and support for ProMotion.
1. Intel Mac Mini
Current model released October 2018 (four years and one month old).
While the M1 Mac mini offers an entry-level model in the lineup, the high-end Mac mini still features an Intel processor. The high-end Mac mini was theoretically refreshed in 2020 when Apple doubled the storage on the device, but it is otherwise identical to the 2018 Space Gray unibody model.
Apple has been believed to be working on a new Mac mini for some time. The potential of replacing the older high-end model with an Apple silicon machine was previously at the center of rumors related to new Mac minis, but now it looks like both the entry-level and the high-end model may be refreshed simultaneously. Apple is believed to be working on two versions of the next-generation Mac mini, one with the standard "M2" chip and a second higher-end model with the "M2 Pro" chip.
A new high-end Mac mini with Apple silicon could get massive performance and efficiency benefits compared to the current model, and feature more Thunderbolt ports than the entry-level model. There is also the potential of a redesign. As a machine from over two years before Apple began the transition to its own custom silicon chips in the Mac, and two years since the entry-level Mac mini was refreshed, the high-end Mac mini seems to be the Apple device that is most sorely in need of a hardware refresh.
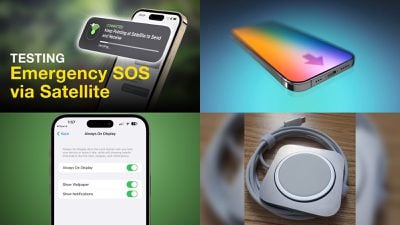
Meeting its promise of a November launch, Apple this week activated its Emergency SOS via Satellite service for iPhone 14 and iPhone 14 Pro models in the U.S. and Canada, with more countries to come.
This week also saw some new additions for iOS 16.2 as it works its way through the beta testing process ahead of a public launch next month, while we saw fresh rumors about next year's iPhone 15 and leaked photos of an unreleased "Magic Charger" from Apple. We're also about to head into the holiday shopping season, so keep an eye out for some great deals!
Testing Apple's New Emergency SOS via Satellite Feature
All four iPhone 14 models support a new Emergency SOS via Satellite feature that allows the devices to connect directly to a satellite, enabling users to send text messages to emergency services when outside the range of cellular and Wi-Fi coverage. The service launched in the U.S. and Canada this week and is free to use for the first two years.
Kuo: iPhone 15 and iPhone 15 Plus Will Have Slower USB-C Ports Compared to Pro Models
iPhone 15 Pro models will feature a USB-C port with support for at least USB 3.2 or Thunderbolt 3, according to analyst Ming-Chi Kuo. This would result in significantly faster wired data transfer speeds compared to existing iPhones with Lightning.
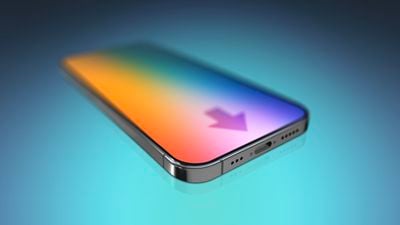
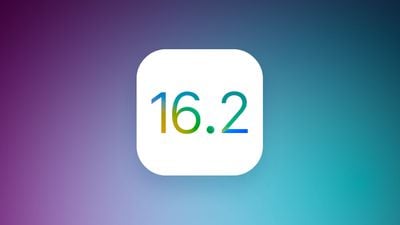
iOS 16.2 Will Let You Disable Wallpaper and Notifications for Always-On Display
Starting with iOS 16.2, currently in beta and expected to be released in December, iPhone 14 Pro users can hide the wallpaper and notifications in Always-On display mode. This results in the Lock Screen having a solid black, minimal appearance in Always-On mode, similar to many Android smartphones.
In the iOS 16.2 beta, the new "Show Wallpaper" and "Show Notifications" toggles are located in the Settings app under Display & Brightness → Always On Display.
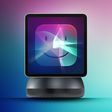
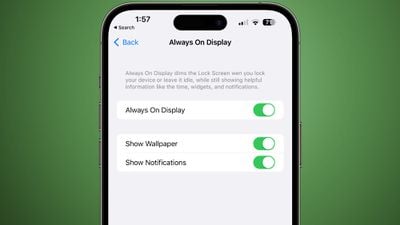
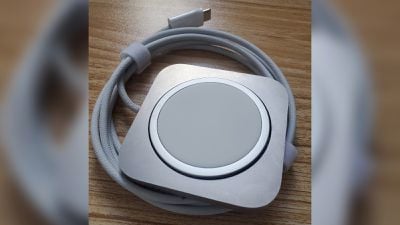
Images of Unreleased 'Apple Magic Charger' Surface Online
The accessory features an aluminum rounded square with an embedded MagSafe charger that can be pushed out into a vertical position. It looks similar to Apple's discontinued iPhone Lightning Dock.
Apple to Hold Black Friday Event Starting November 25
iOS 16.2 for iPhone Expected to Launch in December With These 8 New Features
iOS 16.2 is currently in beta testing and is expected to be released to the public in December. The update includes many new features and changes for the iPhone, such as Apple's new whiteboard app Freeform.
Each week, we publish an email newsletter like this highlighting the top Apple stories, making it a great way to get a bite-sized recap of the week hitting all of the major topics we've covered and tying together related stories for a big-picture view.
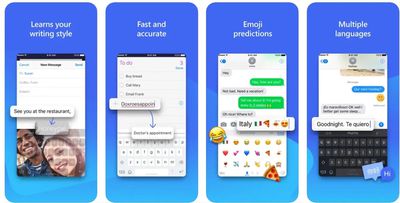
In September, Microsoft said SwiftKey for iOS was being shut down and removed from the App Store for no clear reason. SwiftKey has been a popular alternative for iPhone users to Apple's default iOS keyboard, leaving many disappointed by the decision. Now, a few weeks later, Microsoft says due to customer feedback, it is bringing the app back to the App Store.
"Based on customer feedback, SwiftKey iOS has been relisted on the Apple App Store," said Microsoft spokesperson Caitlin Roulston to The Verge. The news was also shared on Twitter, with a Microsoft employee teasing for users to "stay tuned" to what's in store for the app.
Apple's AirPods Pro 2 headphones have dropped to a new all-time low price of $197.99 on Woot, down from $249.00. The AirPods Pro 2 are in brand new condition on Woot and as of writing they're in stock and ready to ship.
Note: MacRumors is an affiliate partner with some of these vendors. When you click a link and make a purchase, we may receive a small payment, which helps us keep the site running.
With this discount, the AirPods Pro 2 have now reached the lowest price point they've ever seen following their release in September. Woot's sale has been automatically applied so you don't need any coupon code or have to wait until checkout to see the discount.
The AirPods Pro 2 are similar in design to the original AirPods Pro, featuring a rounded design with silicone ear tips and a short stem. Apple added the H2 chip that enables new capabilities, including improved Active Noise Cancellation and and update to Transparency mode with an Adaptive Transparency feature that is designed to reduce loud environmental noise without blocking out all sound.
If you need more of an in-depth breakdown on the differences between the AirPods Pro 1 and AirPods Pro 2, check out our Buyer's Guide detailing all of the similarities and differences between each model.
We're keeping track of all of the season's best Apple-related deals in our Black Friday roundup, so be sure to check back throughout the month for an updated list of all the most notable discounts you'll find for Black Friday 2022.
Update: This deal has now sold out. If it returns we'll be sure to update this article.
We're still a week away from Black Friday, but deals are already starting to hit with increasing frequency. The latest one comes from Amazon with a $60 discount on all Apple Watch Ultra configurations, bringing them down to $739.
Note: MacRumors is an affiliate partner with Amazon. When you click a link and make a purchase, we may receive a small payment, which helps us keep the site running.
This is the lowest pricing we've seen for the Apple Watch Ultra, which was just released in September. Previous maximum discounts have only been in the $20 range on select band options.
Every so often, MacRumors videographer Dan Barbera updates his desk with new Mac-centric products that help improve his workflow as he records and edits videos for the site. Dan has just shared a 2022 desk update over on the MacRumors YouTube channel, highlighting all kinds of new desk accessories that you might want to check out for your own setup.
MX Mechanical Mini Keyboard for Mac ($150) - Designed for Macs, the MX Mechanical Mini Keyboard has a Mac-centric keyboard layout with Tactile Quiet low-profile switches and backlit keys.
MX Master 3S Mouse ($100) - The MX Master 3S Mouse has also been designed specifically for the Mac, featuring a MagSpeed Electromagnetic wheel and an adjustable DPI that can be used with high-resolution displays. It can connect to three devices at once.
Ugmonk Desk Accessories ($449 for a set) - Ugmonk recently came out with a new collection of desk accessories called "Gather," which includes things like monitor stands and organizers, headphone stands, and shelves for streamlining your desktop. Note that this is a Kickstarter, so back with caution. Products will not arrive until spring 2023.
ALTI Wireless Charging Desk Mat ($130) - The ALTI Wireless Charging Desk Mat is a vegan leather and felt desk mat that has a smooth surface for a mouse and then an add-on wireless charger that works with your iPhone and AirPods. Note that this wireless charger has magnetic charging, but it is limited to charging an iPhone at a maximum of 7.5W because it is not an official MagSafe charging solution.
Volt 276 ($269) - The Volt 276 audio interface is designed for those who create music, videos, and podcasts. It plugs into a Mac and improves vocals, instruments, and other audio while you record.
Loupedeck Live ($269) - The Loupedeck Live is a custom touch screen console that you can program to create quick access buttons for any app. It is designed to be used for live streaming, but shortcuts and macros can be created for any software.
Make sure to watch our video up above to see all of these products in action, and let us know if you have suggestions for other accessories we should check out in a future video.
VMware today announced the launch of Fusion 13, the latest major update to the Fusion virtualization software. For those unfamiliar with Fusion, it is designed to allow Mac users to operate virtual machines to run non-macOS operating systems like Windows 11.
Fusion 13 Pro and Fusion 13 Player are compatible with both Intel Macs and Apple silicon Macs equipped with M-series chips, offering native support. VMware has been testing Apple silicon support for several months now ahead of the launch of the latest version of Fusion.
With Fusion 13, Intel and Apple silicon Mac users can access Windows 11 virtual machines. Intel Macs offer full support for Windows 11, while on Apple silicon, VMware says there is a first round of features for Windows 11 on Arm.
VMware Tools provides virtual graphics and networking, and more is still to come. With certified and signed drivers Windows 11 looks fantastic, and adjust the resolution to 4K and beyond! Note that Fusion on Apple Silicon must run the Arm variant of Windows 11, and it does not support the x86/Intel version of Windows.
Users who need to run traditional win32 and x64 apps can do so through built-in emulation.
Fusion 13 also includes a TPM 2.0 virtual device that can be added to any VM, storing contents in an encrypted section of the virtual machine files and offering hardware-tpm functionality parity. To support this feature, Fusion 13 uses a fast encryption type that encrypts only the parts of the VM necessary to support the TPM device for performance and security.
The software supports OpenGL 4.3 in Windows and Linux VMs on Intel and in Linux VMs on Apple silicon.
Fusion 13 Player is free for personal use, and commercial licenses for both versions are available at a 30 percent discount to celebrate the launch. VMware Fusion 13 Player is priced at $104.30, and VMware Fusion Pro is priced at $139.30. Upgrades from prior versions are also available at a lower cost.
Any U.S. smartphone user with an eSIM and unlocked device can get 100GB of 4G/5G data to test out the Verizon network before committing to switching to the carrier. Verizon's program is similar to the Network Pass option offered by T-Mobile, though it doesn't last as long.
In addition to 100GB of data, Verizon's test program includes unlimited talk and text, and the service can be used alongside an existing cellular subscription. 4K streaming quality is available over 5G Ultra Wideband, while streaming is limited to 480p on LTE and 5G Nationwide.
Those who want to try Verizon can scan the QR code on the Test Drive FAQ page to download the My Verizon app to get access to the free trial. As mentioned above, an unlocked, eSIM-capable smartphone is required, and testers cannot be existing Verizon subscribers. eSIM compatible iPhones include the iPhone XR and later.
After the Test Drive, Verizon offers a streamlined process for porting a number over and choosing a 5G plan. For those who opt not to continue with the service, the trial simply ends when the 30-day period has expired, with no need to cancel as no credit card is required.
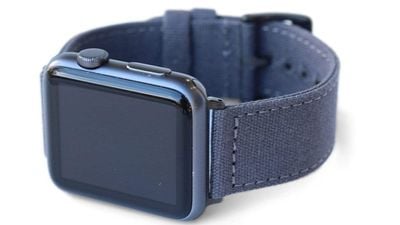
For this week's giveaway, we've teamed up with BluShark to offer MacRumors readers a chance to win one of Apple's new Apple Watch Series 8 models, plus a matching BluShark Apple Watch band to go along with it.
BluShark offers a wide selection of Apple Watch bands in materials ranging from leather, to canvas, to AlphaPremier and more. There are all kinds of colors and materials to choose from, and each band is carefully crafted with high-quality materials. BluShark is not just an Apple Watch band company, and has been producing watch bands for years.
Pricing on the BluShark Apple Watch bands is affordable, ranging from $10 for silicone options to $78 for high-end crocodile leather bands. All BluShark bands are sized to fit all Apple Watch models, from older 38mm models to the large 49mm Apple Watch Ultra.
For those who are fans of the Apple Watch Ultra, BluShark makes a Multiloop band that is similar in design to the much pricier Alpine Loop that Apple just came out with. Priced at $32, the Multiloop band has an adjustable G-hook design and it comes in green, linen, orange, and black. BluShark sells all of the colors together for $78, and there are also sitewide deals for free bands if you buy two, three, or four together.
BluShark's Knit Weave bands also pair well with the Apple Watch Ultra and the Apple Watch Series 8 models. They're made from a unique nylon weave material that has a texture resembling a knit fabric and an eyecatching depth of color. Knit Weave bands are priced at $32 and come in a whole range of colors from black to gray to brown, plus there are various striped options.
The company's AlphaPremier bands feature a seatbelt weave nylon and a comfortable fit with a dual-layer design, and the Leather bands come in a variety of designs and colors.
We have an aluminum Apple Watch Series 8 to give away, with the winner able to select the size and color. The winner will also be able to choose the BluShark band of their choice.
To enter to win, use the Gleam.io widget below and enter an email address. Email addresses will be used solely for contact purposes to reach the winners and send the prizes. You can earn additional entries by subscribing to our weekly newsletter, subscribing to our YouTube channel, following us on Twitter, following us on Instagram, or visiting the MacRumorsFacebook page.
Due to the complexities of international laws regarding giveaways, only U.S. residents who are 18 years or older, UK residents who are 18 years or older, and Canadian residents (excluding Quebec) who have reached the age of majority in their province or territory are eligible to enter. All federal, state, provincial, and/or local taxes, fees, and surcharges are the sole responsibility of the prize winner. To offer feedback or get more information on the giveaway restrictions, please refer to our Site Feedback section, as that is where discussion of the rules will be redirected.
The contest will run from today (November 18) at 9:00 a.m. Pacific Time through 9:00 a.m. Pacific Time on November 25. The winner will be chosen randomly on November 25 and will be contacted by email. The winner will have 48 hours to respond and provide a shipping address before a new winner is chosen.
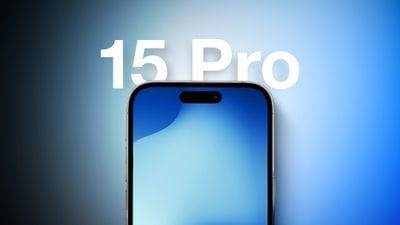
While we're still around 10 months away from Apple introducing the iPhone 15 lineup, rumors already suggest that the higher-end Pro models will have even more exclusive features than usual compared to the standard models next year.
In September, analyst Ming-Chi Kuo said that strong sales of iPhone 14 Pro models would likely encourage Apple to increase differentiation between the iPhone 15 Pro and iPhone 15 Pro Max and the standard iPhone 15 and iPhone 15 Plus, although it's worth noting that many hardware changes are likely planned at least a few years in advance.
There are currently at least five features rumored to be exclusive to iPhone 15 Pro models:
A17 chip: iPhone 15 Pro models will be equipped with an A17 Bionic chip manufactured based on TSMC's second-generation 3nm process, providing performance and efficiency improvements, according to Japanese publication Nikkei Asia. The report claimed that 2023 could mark the second year in a row in which only the Pro models of the new iPhone lineup feature Apple's latest chip.
Faster USB-C port: iPhone 15 Pro models will feature a USB-C port with support for at least USB 3.2 or Thunderbolt 3, according to analyst Ming-Chi Kuo, which would result in the devices having significantly faster data transfer speeds with a cable compared to existing iPhones with Lightning. Kuo said the USB-C port on standard iPhone 15 models will remain limited to USB 2.0 speeds like Lightning.
Increased RAM: iPhone 15 Pro models will be equipped with an increased 8GB of RAM, according to Taiwanese research firm TrendForce, while the standard models will likely continue to have 6GB of RAM as they do currently. Additional RAM can allow apps like Safari to keep more content active in the background, preventing the app from reloading content when reopened.
Solid-state buttons: iPhone 15 Pro models will feature solid-state volume and power buttons, according to Kuo. The analyst said the devices will be equipped with two additional Taptic Engines that provide haptic feedback to simulate the feeling of pressing the buttons, without them physically moving, similar to the Home button on the latest iPhone SE or the trackpad on newer MacBooks.
Increased optical zoom for iPhone 15 Pro Max: The iPhone 15 Pro Max will feature a periscope telephoto lens, according to Kuo. This could result in the device having at least 10x optical zoom, compared to 3x on iPhone 14 Pro models.
Pushing customers towards the Pro models would help Apple to increase the iPhone's average selling price. The trend already began this year when only the iPhone 14 Pro models received Apple's latest A16 Bionic chip, with the standard iPhone 14 and iPhone 14 Plus models still equipped with last year's A15 Bionic chip.
Apple will likely announce the iPhone 15 lineup next September as usual. With many months remaining until the devices launch, it's likely that additional features will surface, so the info we have right now is only a glimpse at what to expect.
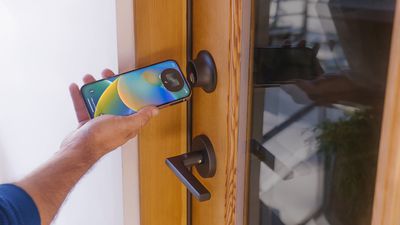
Created by smart lock maker Level, the Level Lock+ is the one of the first Home Key-compatible smart locks on the market, designed to unlock a door automatically when a Home Key-enabled iPhone or Apple Watch is held near it.
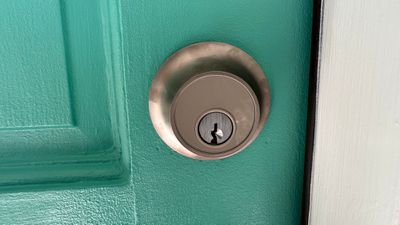
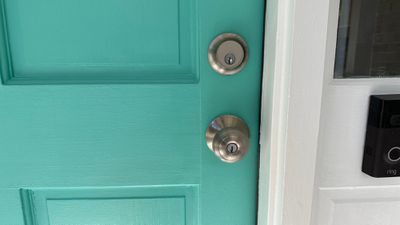
The Level Lock+ replaces the prior-generation Level Lock, and it uses that same unassuming design. Many smart locks are immediately recognizable as smart locks, but the Level Lock+ looks like any standard deadbolt with all of the smart capabilities hidden away inside the door, with no bulky components inside or out.
There are limited color options with the Level Lock+, but it does come in satin nickel and matte black. It's not going to match well with bronze, gold, or similar door hardware, so I do wish that it came in additional color options. The Level Lock+ is sleek looking and I am a fan of the simplicity. It's unassuming on the door, and it looks like nothing special, so it doesn't draw attention.
The Level Lock+ replaces an existing deadbolt, and installation is fairly straightforward. I had a setup that had included a keypad, so I needed to paint the door and do a bit of repair before I could get it installed. I have never installed a door lock before, but the Level Lock+ instructions were simple enough to follow.
The bolt is adjustable and there are two sizes. The end of the bolt basically needs to stick out of the borehole, and if it doesn't on the smaller size, it needs to be adjusted to the larger size. For my door, the larger size was too long and the smaller size was not quite right either, so I did have to do some sanding and tweaking of the deadbolt cutout to get things to fit right.
After about five minutes of sanding, I was able to get the bolt in the right position, and from there, the Level Lock+ hardware fit right into the deadbolt cutout and snapped into the end of the bolt, which is where the battery is housed. It's a clever setup because you can change the battery just by popping the end of the deadbolt.
Once I managed to get everything aligned correctly, it was just a matter of screwing everything together. I did run into another problem with the strike plate, as it was smaller than my existing strike plate. I had to drill new holes, which wasn't a big deal. In the end, everything lined up properly and I had the lock up and functional within about 20 minutes.
The Level Lock takes a CR2 battery, and I'm not sure how long the battery lasts before it needs to be replaced. The CR2 batteries are about $4 each, and the amount of battery life you get will likely vary based on how often you're unlocking your door. There is a physical key, so access is available if the battery dies and you're not home.
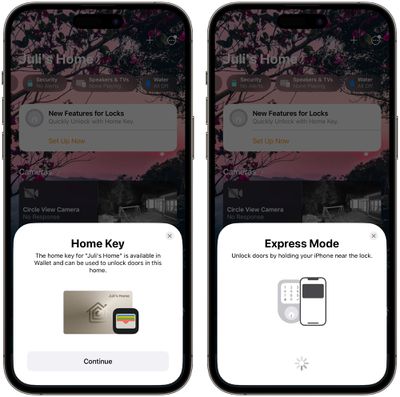
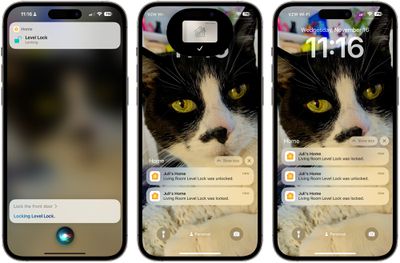
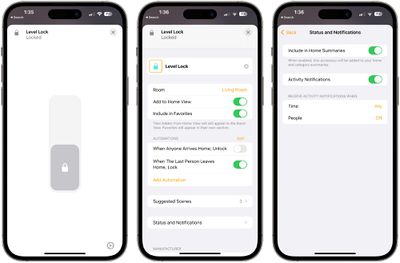
After setup, I was able to add the lock to the Level app and connect it to HomeKit, making it available for use both in the Home app and the Level app. Once added to HomeKit, the Home app gave me the option to use Home Keys with the Level Lock, and I just needed to tap on the banner in the Home app to add the Level Lock to Wallet.
Home Keys are an iOS 16 feature that let you store your house key in the Wallet app, and from there, unlock your front door with your iPhone using NFC. Home Keys did not initially work for me, but I re-added the lock to HomeKit and then it worked well.
With Home Keys, you can enable "Express Mode" in the Wallet app to unlock the door without needing Face ID or a passcode, which is convenient. You just tap the top of the lock with your iPhone and it unlocks with no other authentication and even when the phone is locked. It also can continue to unlock the door for a few hours after the iPhone battery has died thanks to NFC.
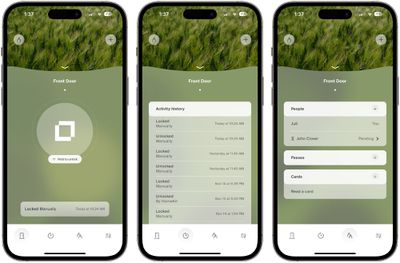
There are a lot of ways to unlock the Level Lock. In addition to Home Keys, you can use the Level app, the Home app, ask Siri, use a key, or set up a key card. With a Home hub, you can open the lock remotely for guests or provide them with a pass so they can use their own smartphone to unlock your door as needed.
You can set it up so each person in your home can access the Level Lock, and the Level app has a list of every time the lock was locked or unlocked. You'll also get Home app notifications when the Level Lock is accessed. The Home app supports automations, so you can set up functions to lock the Level Lock when the last person in the home leaves, lock it at night, and unlock it when you arrive home, if you want.
Since I was able to get Home Keys set up, I haven't had an issue accessing the Level Lock with any of the available methods, and it is convenient to be able to open my lock in a multitude of ways, and to have the option to open it for a guest if I'm not home. The Level Lock takes just a few seconds to unlock when directed to do so, and you can hear the mechanism inside working.
I do want to touch on the physical security of the Level Lock as there is a popular video from Lockpicking Lawyer that shows him accessing the Level Lock in just seconds with a simple rake tool. The Level Lock is not a hard lock to pick, and anyone who has a small amount of lockpicking knowledge and common tools can likely get into it. My partner, for example, does lockpicking as a hobby and was able to pick the Level Lock in less than 30 seconds.
There are a lot of deadbolts and door locks that are simple to pick and take little effort to access, so this is not a major surprise, but Level could have ramped up the security here. Some easily acquirable deadbolts from companies like Schlage are more secure, which makes them pickable, but with more of a time investment and more specialized tools.
A door lock is more of a social contract than anything else, serving as a signal that your house is locked up and should not be accessed. Someone who really wants to get into a locked house likely has many alternative means to do so beyond lockpicking, such as breaking a window. Still, I think the pickability is something that any potential buyer should be aware of.
Level says that its lock has a BHMA AAA rating, but this rating is based on weight, withstanding a sledgehammer, and withstanding an attempt to pull the door open. It also takes into account durability, such as smooth functionality and resistance to dents, but it is in no way a measure of security from lockpicking. If security is a top priority, you'd be better off with specialized high security locks than the Level Lock+ or anything that can be bought off the shelf at a big box store.
Bottom Line
The Level Lock+ is super convenient, plus it's sleek and looks unassuming. It's so nice to be able to tap my iPhone on my lock and open the door, and I have found it handy to be able to unlock the door for guests from another room, as well as letting in workers when I am not home.
That said, this is a pricey lock at $329, and I would have liked to see a more robust, secure product at that price point. Level has pointed out that the Level Lock+ has a typical C lock cylinder used by hundreds of lock brands on the market, and that many consumer grade locks can be easily picked, but that doesn't seem like a great excuse for a lock that's over $300. Most locks that Level is talking about are around $30 at Home Depot, and that's a major price difference.
Hopefully the next iteration of the Level Lock will include some additional security features. It doesn't need to be unpickable because that's not the main way criminals are breaking into houses, but just an extra layer of security would have been nice to keep it from popping open with basic tools in 30 seconds.
Note: Level provided MacRumors with the Level Lock+ for the purpose of this review. No other compensation was received. MacRumors is an affiliate partner with Level. When you click a link and make a purchase, we may receive a small payment, which helps us keep the site running.
Verizon today is discounting Apple's 2021 AirPods Pro with MagSafe Charging Case to $159.99, down from $249.99. As with other Verizon sales, free two day shipping is available and you don't need to be a Verizon customer to get this deal.
Note: MacRumors is an affiliate partner with Verizon. When you click a link and make a purchase, we may receive a small payment, which helps us keep the site running.
This price point on the AirPods Pro is a match of the previous all-time low price that we most recently saw very briefly on Amazon. Stock for the 2021 AirPods Pro has been dwindling since the announcement of the second generation model, so Verizon's deal today makes for a great chance to get the previous generation model at its best price before it disappears again.
This model of the AirPods Pro was introduced in 2021 with the MagSafe Charging Case, but otherwise the headphones themselves are the same as the 2019 AirPods Pro.
Verizon also has a great deal on the HomePod mini, with every color dropping to $79.99, down from $99.99. HomePod mini deals are also very rare, making for another solid early Black Friday offer from the carrier.
We're keeping track of all of the season's best Apple-related deals in our Black Friday roundup, so be sure to check back throughout the month for an updated list of all the most notable discounts you'll find for Black Friday 2022.
Following the release of the Emergency SOS via satellite feature for the iPhone 14 lineup earlier this week, we talk through demoing the feature and our expectations for where it will truly be useful in the future. We also look at Apple's ecosystem of MagSafe accessories after it emerged that the company abanoned plans to release a "Magic Charger" for the iPhone.
Last week, Bloomberg's Mark Gurman reported that work on realityOS, the operating system designed for Apple's mixed-reality headset, is "wrapping up internally" as the company's focus turns to apps on the new platform. Meanwhile, DigiTimes reports that Apple is targeting March 2023 to begin mass production of the headset – a time frame that fits in with other key reports. As signs of the headset's introduction in the first half of the next year appear to solidify, we discuss how the device's announcement and launch is likely to take place, as well as Apple's AR/VR roadmap for the future.
If you haven't already listened to the last episode of The MacRumors Show, be sure to catch up for a deep dive into the key features of macOS Ventura and expectations about upcoming Mac models with John Gruber.
 Note: MacRumors is an affiliate partner with some of these vendors. When you click a link and make a purchase, we may receive a small payment, which helps us keep the site running.
 Note: MacRumors is an affiliate partner with some of these vendors. When you click a link and make a purchase, we may receive a small payment, which helps us keep the site running.
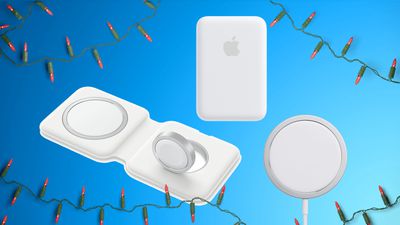

 Note: MacRumors is an affiliate partner with Sonos. When you click a link and make a purchase, we may receive a small payment, which helps us keep the site running.
 Note: MacRumors is an affiliate partner with some of these vendors. When you click a link and make a purchase, we may receive a small payment, which helps us keep the site running.


 Note: MacRumors is an affiliate partner with some of these vendors. When you click a link and make a purchase, we may receive a small payment, which helps us keep the site running.
 Note: MacRumors is an affiliate partner with Amazon. When you click a link and make a purchase, we may receive a small payment, which helps us keep the site running.


 Note: MacRumors is an affiliate partner with Verizon. When you click a link and make a purchase, we may receive a small payment, which helps us keep the site running.