Marianne Schultz

Marianne has been writing about technology professionally since 2008. She owns more gadgets and Apple products than just about anyone else she knows and is drafted to do tech support for nearly everyone she meets. She lives in Boston, Massachusetts.
Marianne Schultz's Articles
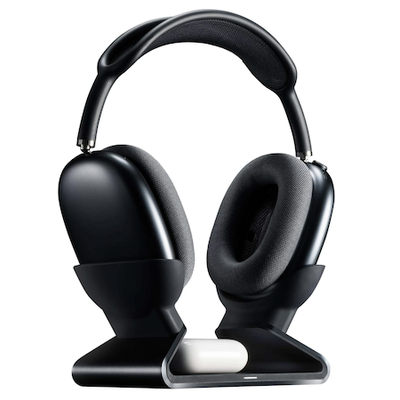
Review: Mophie's Max Charging Stand for AirPods Max is Pricey but Good
Last month, Mophie announced the launch of its Max Charging Stand. Aimed squarely at those with multiple sets of Apple's headphones, it can charge AirPods Max headphones plus a pair of AirPods or AirPods Pro at the same time.
Priced at $150, it immediately garnered criticism in our forum, largely over its price point compared to its functionality. But is it actually worth it? I've spent a...
Read Full Article • 21 comments
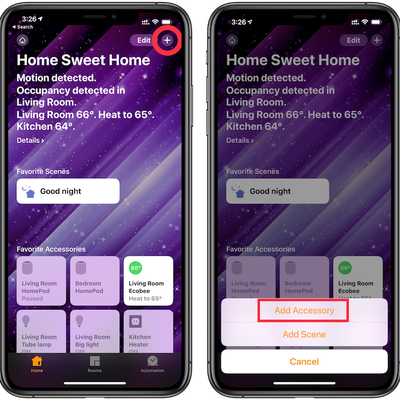
How to Add an Accessory to Your HomeKit Setup
Adding an accessory to your smart home setup is fairly straightforward, though there are a few areas where it's not entirely intuitive. Before you get started, it's helpful to locate the HomeKit Setup Code for the accessory you're adding.
This is usually in 2 places: printed on an included user guide or the package, and on a sticker somewhere on the device itself. It will have a HomeKit icon...
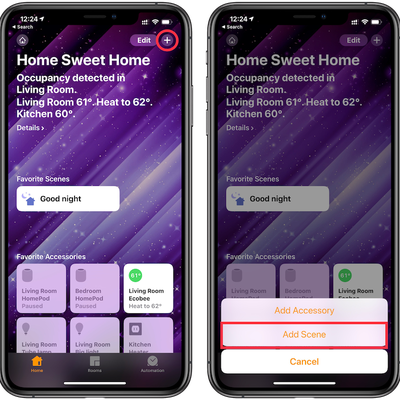
How to Create a HomeKit Scene
Controlling individual devices with the Home app is easy enough manually or with Siri, but sometimes you need to change the state of several devices at once. Instead of making these changes one by one, the easiest way is to create a Scene.
For example, creating a bedtime Scene could turn off all the lights in your home at once and set your thermostat to a more economical temperature.Here's...
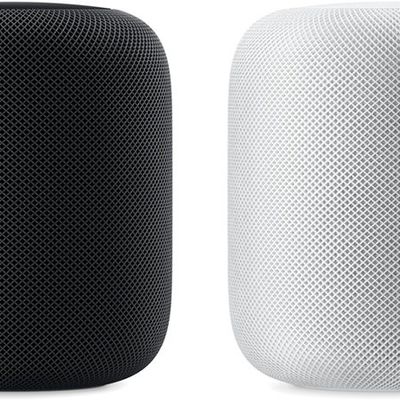
How to Set Up HomePod as a Home Hub for HomeKit Devices
More and more smart home products include compatibility with Apple's HomeKit framework, allowing easy and automated control through an iOS device or Mac. Yet there are some actions that require the presence of a home hub, a device that remains powered on and connected at your home that can relay the commands you give via Siri while you're away. Apple's HomePod can act as such a hub, offering...
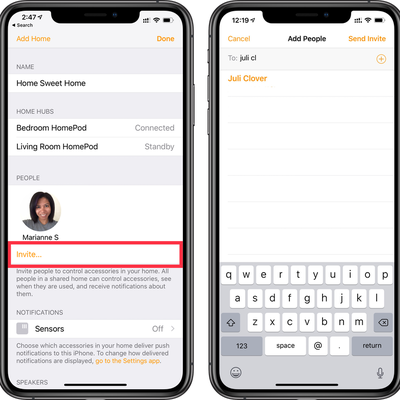
How to Share Access to Your HomeKit Devices with Others
If you share your home with family or roommates, it often makes sense to share access to HomeKit devices with them so they can control your connected lights, blinds, thermostats, etc. As long as they use an iPhone or iPad running iOS 10 or later or a Mac running macOS Mojave or later, Apple makes it easy for you to grant them access via their iCloud account.
On an iPhone or iPad, open the Home ...
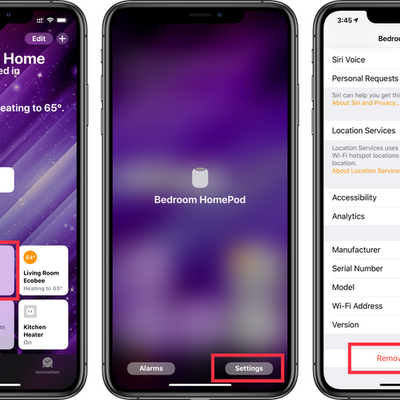
How to Delete a Device from HomeKit with the Home App
If you want to get rid of a HomeKit device or remove it from your HomeKit setup, Apple has made doing so very easy.
In the Home app on your iPhone or iPad:
Press and hold the icon of the accessory you want to remove.
Tap on Settings.
Scroll to the bottom and tap on Remove Accessory.
Removing a HomeKit device on Mac:
Open the Home app and double click (or right-click) on the...
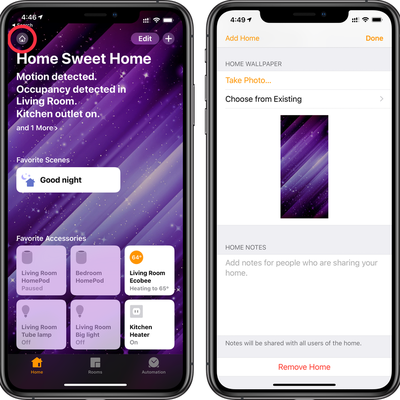
How to Change the Wallpaper in the Home App
Like the home screen on your iPhone and iPad and the desktop on your Mac, you can customize the background of the Home app. The default image of a fence draped in red leafy vines is nice, but you may want an image with some personal meaning or a different aesthetic. Making a change is easy.
In the Home app on an iPhone or iPad:
Click on the home icon in the top left corner.
Scroll down to...
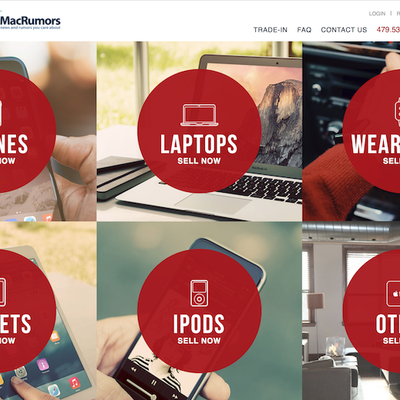
Get Cash for Your Old iPhone, iPad, or Apple Watch Through MacRumors and MyPhones Unlimited
With new iPhone and Apple Watch models now on the shelves, you may be thinking of paving the way for an upgrade by selling your current device. We've partnered with MyPhones Unlimited, an Arkansas-based company that buys used iPhones, iPads, Apple Watches, and much more at competitive prices, to offer our readers a way to get cash in hand to make an upgrade happen.
Entering the details for ...
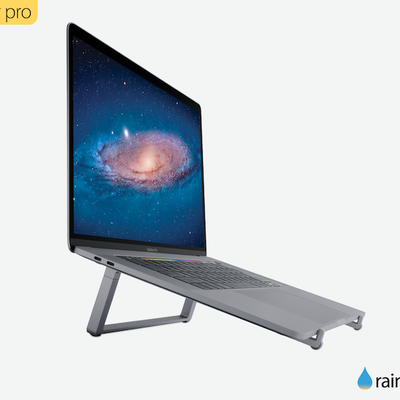
MacRumors Giveaway: Win a Rain Design mBar pro or mBar pro+ Portable Laptop Stand
With several of our recent giveaways focusing on Apple's new iPhone models that are launching today in the US and several other countries, today's giveaway goes back to the Mac. Rain Design is kindly offering its portable aluminum stands for the MacBook and MacBook Pro to ten lucky winners.
Rain Design is offering 5 of each of its mBar pro and mBar pro+ folding aluminum laptop stands. The...
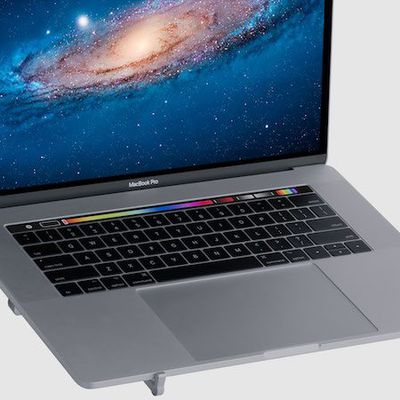
Review: Rain Design's mBar Pro is a Portable Aluminum Stand for Your MacBook
Rain Design, a maker of accessories for Apple products, released three laptop stands made of anodized aluminum to match Apple's MacBook and MacBook Pro models earlier this year: the mBar, mBar Pro, and mBar Pro+. The mBar is a minimalist MacBook stand with fixed arms that's not meant to be portable, and the mBar Pro and Pro+ have folding arms for easy portability.
A laptop stand can be a...

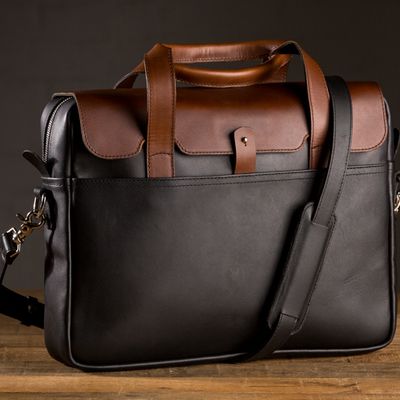
MacRumors Giveaway: Win a $600 Accessory Package from Pad & Quill
For this week's giveaway, Pad & Quill is generously offering a package of accessories with a total retail value of over $600 for one lucky winner.
This prize package includes the company's Large Briefcase that can accommodate up to a 15-inch laptop and features full-grain American cowhide leather, parachute-grade nylon stitching, and a 25-year warranty. The Large Briefcase retails for $365...
MacRumors Giveaway: Win a Pad & Quill 'Everyday Developer Carry Kit' Package
In celebration of Apple's Worldwide Developers Conference, Pad & Quill, the maker of premium MacBook, iPhone, and iPad cases and other accessories, is generously offering an 'Everyday Developer Carry Kit' package where one winner can choose a briefcase bag, iPad case, iPhone case, and an Apple Watch band from the company's entire product line-up.
Pad & Quill offers several briefcase bag...
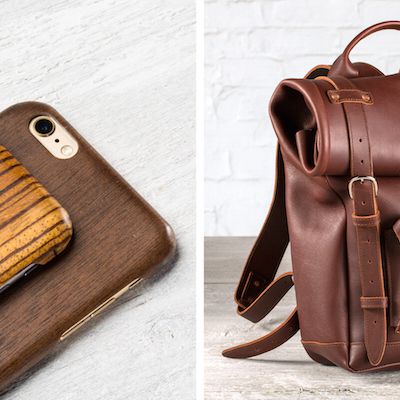
MacRumors Giveaway: Win a Pad & Quill Woodline iPhone Case or Roll Top Leather Backpack
For this week's giveaway, Pad & Quill, the maker of premium MacBook, iPhone, and iPad cases and other accessories, is graciously offering its Woodline iPhone cases and Roll Top Leather Backpack as prizes to the lucky winners.
The Woodline iPhone cases are made of real hardwood, which is polished and scratch-resistant, with a polymer core. The cases are thin, coming in at just .9 millimeter...
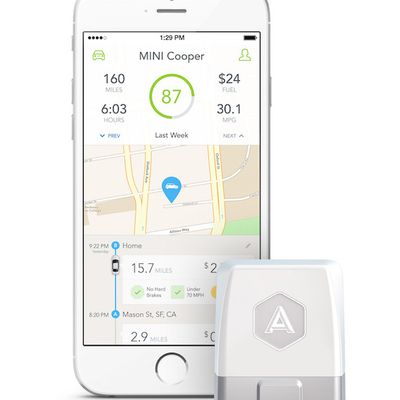
MacRumors Giveaway: Win an Automatic Adapter or Get a 20% Discount
Automatic has partnered with us for our next giveaway, graciously offering one Automatic Adapter that provides information about your car's status and performance and your driving habits via a companion app. The Automatic adapter was first announced in early 2013 with recent updates last year bringing a second-generation adapter with additional functionality and the release of an SDK and App...
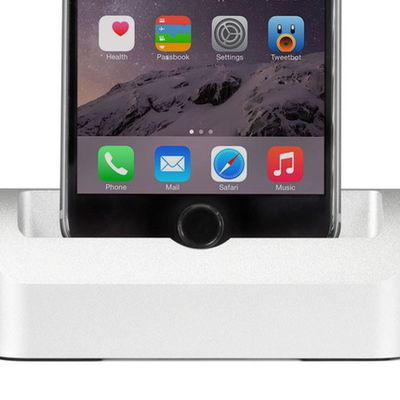
MacRumors Gift Guide by Marianne: Elevation Dock, Fluxmob Bolt, and More
To provide gift ideas for our readers this holiday season, we here at MacRumors have written gift guides based on our own experiences with products we like and recommend to others. If you want to catch up, here are links to the guides published so far: Juli Clover, Joe Rossignol, and Mitchel Broussard.
Here's my selection of gift suggestions based on products I own, use often, and recommend...
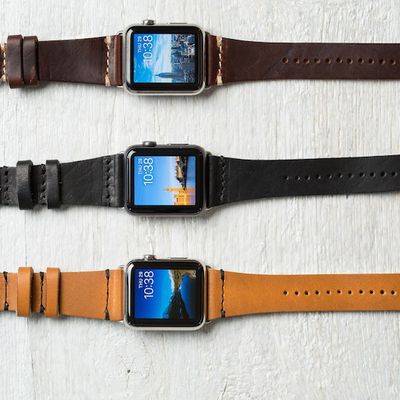
MacRumors Giveaway: Win a Pad & Quill Apple Watch Band or iPhone Case
For this week's giveaway, we've partnered again with Pad & Quill, the maker of premium MacBook, iPhone, and iPad cases and other accessories. Pad & Quill is kindly offering prizes from its lines of leather watch bands and iPhone cases to the lucky winners.
Pad & Quill's Lowry line of leather watch bands come in a cuff style and a standard band style. The Lowry Cuff is sized specifically...
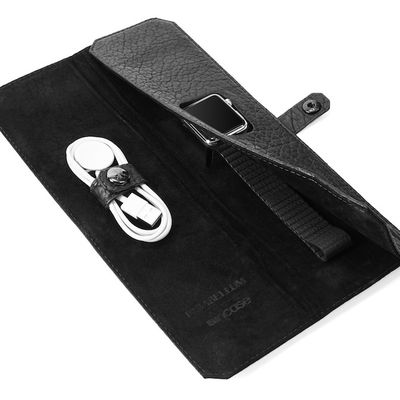
MacRumors Giveaway: Win an Incase Apple Watch Travel Folio, Icon Backpack, or Portable Power 5400
For our next giveaway, we've partnered with Incase, the maker of sleek, modern accessories for the iPhone, iPad, Mac, and more. Incase is generously offering three items from its product line-up: the new Incase x Parabellum Apple Watch Travel Folio, an Icon backpack, and Portable Power 5400 battery pack.
The Apple Watch Travel Folio is Incase's newest product that's made in partnership...
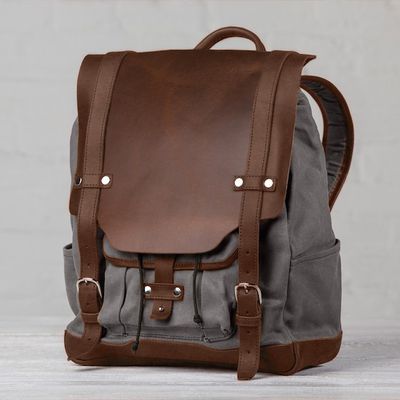
MacRumors Giveaway: Win a Pad & Quill Leather Backpack or Briefcase
For our next giveaway, we've partnered again with Pad & Quill, the maker of premium MacBook, iPhone, and iPad cases and other accessories. Pad & Quill is graciously offering three bags from the company's new line-up of briefcases and backpacks, including the Leather Backpack (also available in a larger size), the Briefcase (also available in a larger size), and the Luxury Briefcase.
The...
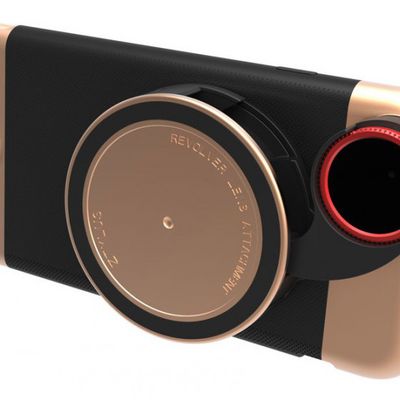
MacRumors Giveaway: Win a Ztylus Limited Edition Camera Kit for iPhone 6/6 Plus
For our next giveaway, we've partnered with Ztylus, a maker of smartphone cases with interchangeable accessory attachments. Ztylus is graciously offering one limited edition Rose Gold Camera Kit for the iPhone 6 or iPhone 6 Plus that retails for $149.95.
The Ztylus Rose Gold Camera Kit consists of a full-coverage case and a 4-in-1 lens attachment. The case itself has a textured leather...
MacRumors Giveaway: Pad & Quill Valet Luxury Sleeve and Apple Watch Accessory
For our next giveaway here at MacRumors, we've again partnered with Pad & Quill, the maker of premium MacBook, iPhone, and iPad cases and other accessories. Pad & Quill is graciously offering a package of two prizes for this giveaway – the winner will be able to choose one leather Valet Luxury Sleeve (for the 11-inch Macbook Air, 12-inch MacBook, or 13-inch MacBook Pro, or the 15-inch MacBook Pro)...