Today we're tracking a collection of discounts on Apple's M4 MacBook Pro at Amazon, including as much as $450 off select models of the computer. All of these deals have been applied automatically on Amazon and do not require an on-page coupon in order to see the final sale price.
Note: MacRumors is an affiliate partner with Amazon. When you click a link and make a purchase, we may receive a small payment, which helps us keep the site running.
Deals include both 14-inch and 16-inch models, and the biggest savings will be found on the latter group. The steepest discount is on the 16-inch MacBook Pro (M4 Max 48GB RAM/1TB), available for $3,549.00, down from $3,999.00. At $450 off this is a new all-time low price on the high-end model.
For the 14-inch models, you'll find up to $350 off these computers on Amazon this week. You can get the entry-level 14-inch MacBook Pro (16GB RAM/512GB) for $1,399.00, down from $1,599.00, which is just a few dollars higher when compared to the all-time low price on the computer.
Keep up with all of this week's best discounts on Apple products and related accessories in our dedicated Apple Deals roundup.
Deals Newsletter
Interested in hearing more about the best deals you can find in 2025? Sign up for our Deals Newsletter and we'll keep you updated so you don't miss the biggest deals of the season!
At WWDC 2024, Apple announced Swift Assist, an AI-powered coding companion integrated into Xcode 16 that's designed to assist developers by generating code from natural language prompts. At the time, Apple said Swift Assist would be coming "later this year."
We're now three months into 2025, and it's nowhere to be seen.
Swift Assist (Image: Apple)
Unlike Apple Intelligence, Swift Assist never appeared in beta. Apple hasn't announced that it's been delayed or cancelled. The company has since released Xcode 16.3 beta 2, and as Michael Tsai points out, it's not even mentioned in the release notes.
Swift Assist is different from the new predictive code completion engine in Xcode 16 that can suggest the code developers need and runs locally on a developer's device. Here's how Apple described Swift Assist in its Platforms State of the Union:
Building an app is more than just typing code. It's about transforming entire ideas into code. And the easiest way to do that is with natural language. So we created a larger and more powerful model that runs in the cloud. And crafted a unique experience in Xcode that only Apple could deliver. Introducing Swift Assist, a companion for all your coding tasks. And whether you know exactly what you're after, or want help writing the best Swift code, Swift Assist can answer your coding questions and help with tasks like experimenting with new APIs.
Swift Assist knows Apple's latest SDKs and Swift language features, so you'll always get up-to-date and modern code that blend perfectly into your project. So now, tasks like exploring new frameworks and experimenting with new ideas are just one request away. Like all Apple developer services, Swift Assist is built with your privacy and security in mind. Your code is never stored on the server. It's only used for processing your request, and most importantly, Apple doesn't use it for training machine learning models. Swift Assist and the new predictive completions will turbo charge the way you work in Xcode. This marks the beginning of a journey to add extraordinary intelligence into our tools. What an exciting time to be developing for Apple platforms.
Unfortunately, any initial excitement has long been replaced by frustration. Check out some of the comments from the developer community:
I could really use Swift Assist to deal with some SwiftUI problems I'm having. None of the LLMs are particularly good at SwiftUI, and seem to be wasting more of my time than they're saving. When, Apple???? You're the only ones with the data and the incentive to build a really knowledgeable Swift coding LLM.... super frustrating.
Unfortunately Apple are so far behind the AI curve right now. They spent so much time on the useless AR glasses that every other company has killed off. I think [Tim Cook] thought the AR was his iPhone moment. Should have spent the time and money on AI like everyone else. Code complete is a joke compared to VSCode with Copilot.
It's feeling more and more like this is something that will get rolled back to Xcode 17 this summer. Has anybody heard anything about it? Maybe it'll be quietly pulled all together, in favour of better Xcode integration with Chat GPT and the like?
WWDC is starting to feel more and more like a preview of what Apple might release over the coming year - but normally the dev tools they show are shipped by the end of the summer.
It's a bad look for Apple, especially given the current controversy surrounding the company's delayed personalized Siri features. WWDC 2025 is less than three months away, and it seems that developers are beginning to wonder whether they'll ever see Swift Assist in Xcode 16 at all. We've reached out to Apple for comment.
The UK's Competition and Markets Authority (CMA) on Wednesday issued its final verdict on the state of the country's mobile browser market, and the regulator has concluded that Apple's policies are largely responsible for hampering competition and innovation.
The CMA's independent inquiry group's investigation found that Apple's requirement for all iOS browsers to use its WebKit engine is stifling competition, and effectively prevents rival browsers from introducing unique features or optimizations on iPhones and iPads, regardless of their capabilities on other platforms.
The full report outlines several problematic Apple practices beyond the WebKit requirement, including giving Safari preferential access to iOS features compared to competing browsers, imposing limitations on in-app browsing, and prominently displaying Safari as the pre-installed default browser on all iPhones.
Google also came under scrutiny for pre-installing Chrome on Android devices, but the investigation found that Apple's restrictions were more fundamental to market competition. The CMA also flagged the lucrative arrangement where Google pays Apple billions annually to remain the default search engine on iOS devices, noting this deal "significantly reduces their financial incentives to compete."
Both companies have made some concessions since the CMA published its preliminary findings last November. The report acknowledges these improvements have "addressed some, but not all, of the concerns relating to choice architecture," specifically mentioning Apple's December software update that modified how users can change default browsers.
However, to address the remaining issues, the regulator proposed several potential remedies including forcing Apple to allow alternative browser engines on iOS, implementing browser choice screens during device setup (similar to the one found in the EU), and restricting the revenue-sharing search deal between Apple and Google.
These recommendations aren't immediately enforceable, as the CMA is first proceeding with separateinvestigations to determine whether Apple and Google should be designated with "strategic market status" (SMS) under the UK's Digital Markets, Competition and Consumers Act. The designation is expected to be decided later this year, and would give the CMA authority to impose stricter regulations on the companies.
If granted SMS designation, Apple and Google could face legally binding conduct requirements and risk substantial penalties — up to 10% of their annual global turnover — for violations.
The cloud gaming portion of the investigation, which had previously raised concerns about Apple's App Store restrictions, concluded that "no further action is necessary" following policy changes Apple made during the course of the investigation.
Apple's upcoming iPhone 17 Pro models are expected to feature a significant design overhaul, and a new image apparently taken on an assembly line for the unreleased devices appears to confirm the biggest rumored change.
Render of an iPhone 17 Pro model shared by Jon Prosser
The iPhone 17 Pro and iPhone 17 Pro Max are rumored to adopt a horizontal camera bar reminiscent of Google's Pixel series, and this bar is expected to span the width of the device's back, housing the triangular triple-camera setup on the left, and the flash, microphone, and LiDAR sensor on the right. It is not clear why Apple would use this design, nor what the extra space would be used for, but it has shown up several times now.
The image below, shared on X (Twitter) by leaker Majin Bu, purports to show CNC-machined aluminum or titanium chassis components for the iPhone 17 Pro Max that mirror these expected changes, while the large circular openings likely correspond to areas for internal components like the MagSafe coil or battery. The stacked-together parts look precision-milled with visible CNC tool paths, suggesting they are freshly machined structural elements ready for further processing.
There have been reports that Apple may revert to using aluminum frames for the iPhone 17 Pro, moving away from the titanium used in the previous iPhone 15 Pro and iPhone 16 Pro models.
Rumors suggest Apple plans to use a half glass, half aluminum build, which would increase durability. The glass would allow wireless charging to continue to be available, but a partial aluminum frame would be less prone to breakage.
There is said to be a glass section around the Apple logo that's integrated into an overall metal chassis, so the circular openings in the image could also be related to this change. Then again, the openings could be associated with a new wireless reverse charging feature.
Apple has apparently tested a 7.5W reverse wireless charging for the iPhone 17 Pro, which would allow the iPhone to provide wireless power to other Apple devices like AirPods and Apple Watch. Current iPhones are able to provide 4.5W of power to the Apple Watch and AirPods over USB-C, but there is no option for reverse wireless charging.
According to one rumor, the body thickness of the iPhone 17 Pro Max will increase to 8.725mm, up from the 8.25mm of the iPhone 16 Pro Max, which may be to fit a bigger battery.
The camera module redesign extends to the new iPhone 17 Air model, which is set to replace the Plus variant in Apple's lineup. This thinner device will allegedly feature a similar horizontal camera bar design, though it will accommodate just a single camera lens.
In contrast, the base iPhone 17 is expected to maintain the current camera design language seen in the iPhone 16 series, helping to further differentiate Apple's premium and standard offerings. Apple is expected to unveil the iPhone 17 series next September. Are you excited by the expected design changes? Let us know in the comments.
Keynote by keynote, product by product, feature by feature, year after year after year, Apple went from a company that you couldn't believe would even remain solvent, to, by far, the most credible company in tech. Apple remains at no risk of financial bankruptcy (and in fact remains the most profitable company in the world). But their credibility is now damaged. Careers will end before Apple might ever return to the level of "if they say it, you can believe it" credibility the company had earned at the start of June 2024.
This obviously isn't the first time that Apple has failed to deliver. However, Gruber said other examples like the canceled AirPower charging mat "tended to be around the edges," whereas he believes that generative AI is going to be "big" and "important."
It's not the delay by itself that bothers Gruber. He said the true "fiasco" here is that Apple "pitched a story" last year "that wasn't true":
The fiasco here is not that Apple is late on AI. It's also not that they had to announce an embarrassing delay on promised features last week. Those are problems, not fiascos, and problems happen. They're inevitable. Leaders prove their mettle and create their legacies not by how they deal with successes but by how they deal with — how they acknowledge, understand, adapt, and solve — problems. The fiasco is that Apple pitched a story that wasn't true, one that some people within the company surely understood wasn't true, and they set a course based on that.
Gruber said the personalized Siri features announced during the WWDC keynote last year were merely conceptual, and therefore "bullshit":
What Apple showed regarding the upcoming "personalized Siri" at WWDC was not a demo. It was a concept video. Concept videos are bullshit, and a sign of a company in disarray, if not crisis.
He was even more explicit here:
You can stretch the truth and maintain credibility, but you can't maintain credibility with bullshit. And the "more personalized Siri" features, it turns out, were bullshit.
Gruber said Apple's repeated unwillingness or inability to demo the personalized Siri features in action since WWDC last year "should have set off blinding red flashing lights and deafening klaxon alarms" in his head that something was wrong.
Gruber went as far as saying that Apple's culture of excellence could be at risk if this situation is not handled correctly within the company:
Tim Cook should have already held a meeting like that to address and rectify this Siri and Apple Intelligence debacle. If such a meeting hasn't yet occurred or doesn’t happen soon, then, I fear, that's all she wrote. The ride is over. When mediocrity, excuses, and bullshit take root, they take over. A culture of excellence, accountability, and integrity cannot abide the acceptance of any of those things, and will quickly collapse upon itself with the acceptance of all three.
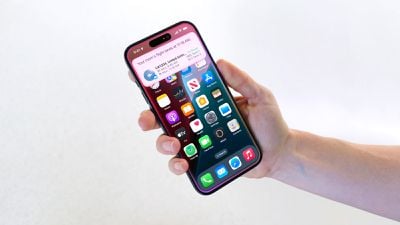
We're not going to get a first look at iOS 19 until the June Worldwide Developers Conference, but as work picks up on the operating system at Apple's headquarters in Cupertino, California, rumors are starting to leak out. iOS 19 promises to be a major update, with some changes that we haven't seen Apple make for at least 10 years.
Overhauled Design
Apple is apparently planning to overhaul the design of all of its operating systems this year, including iOS 19, iPadOS 19, and macOS 16. The goal is a more unified design language and feature set that makes the transition from iPhone to Mac and vice versa feel like less of a shock.
Bloomberg's Mark Gurman says this will be the biggest update Apple has made to the iPhone's design since iOS 7 was released in 2013, and it's not just cosmetic, either.
Apple is planning to overhaul icons, menus, apps, windows, system buttons, and more, while also tweaking navigation and control.
The new look is based on the Apple Vision Pro interface, which features a lot of translucency and a design feel that causes the operating system to kind of fade into the background to put content front and center.
We've heard rumors of what the updated design will do to the Camera app, and it will supposedly have a look that provides more screen space for photo previews with translucent pop-out menus that can be swiped through to select different camera modes.
Apple Intelligence
Apple is going to expand Apple Intelligence features to more of its built-in apps, but we haven't heard a lot of rumors about what's to come. Prior to when iOS 18 came out, it was suggested Apple could use Apple Intelligence for things like generating Apple Music playlists, so that's an example of what we could see.
Siri Updates
We do know about some of the Apple Intelligence features coming, and that's because Apple actually announced them for iOS 18 and then had to delay them.
Apple planned to add new Apple Intelligence features to Siri in iOS 18, making the personal assistant smarter and perhaps actually useful, but Siri changes are now being held until iOS 19 or an update to iOS 19.
We're waiting on personal context, onscreen awareness, and deeper app integration. Personal context will let Siri keep track of everything on your iPhone, from emails and files to photos and messages, helping you complete tasks and find content that you're looking for without. Siri will be able to do things like find a specific photo someone sent you, locate files, or even find information like your passport number if you've written it down in notes.
With onscreen awareness, Siri will be able to see what's on your screen and complete actions involving what you're looking at. If someone sends you an address, for example, you can tell Siri to add it to their contact card.
Deeper app integration, or App Intents, should make a notable difference in what Siri is capable of. Siri will be able to do more in and across apps, performing actions and completing tasks that are just not possible right now. Apple says Siri will be able to do things like move files from one app to another, complete multi-step tasks like editing a photo and sending it to someone, and more.
Apple is also working on a full LLM version of Siri that would be similar to chatbots like ChatGPT, Claude, and Google Gemini, but with the iOS 18 Siri features delayed, it's likely LLM Siri won't be coming until at least iOS 20.
A Staggered Rollout
With iOS 18, not all features were in the update that we got in September. Key Apple Intelligence functions were held back until iOS 18.1 and iOS 18.2, and that's a trend we could see continue with iOS 19.
Apple is holding back features slated for iOS 19 until spring 2026, at least in part due to the work on Siri Apple Intelligence features that were supposed to come in iOS 18.
Compatibility
Rumors suggest that iOS 19 will be compatible with all of the devices that can run iOS 18, so if you have iOS 18 installed, you should in theory be able to run iOS 19. There are typically always features that require the processing power of a newer device, so it's quite possible that some new additions could be limited to the upcoming iPhone 17 models.
Release Date
iOS 19 will be previewed at WWDC in June, then beta tested for several months before launching in September alongside new iPhones.
Read More
For more on what's coming in iOS 19, make sure to check out our iOS 19 roundup. If you want to keep up with rumors, you should bookmark the page, because we update it every time a new rumor comes out.
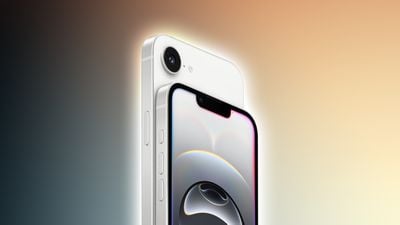
When new iPhone models come out, Sebastiaan de With, the developer behind the popular Halide camera app, does a deep dive into the new camera technology. Last month, Apple released the iPhone 16e with an all-new standalone 48-megapixel camera, and de With checked it out to see how it compares to the cameras in Apple's flagship iPhone 16 models.
On paper, the iPhone 16e, the iPhone 16, and the iPhone 16 Pro seem to have the same main camera, described as a 48-megapixel Fusion camera that's able to take both 1x and 2x shots, but when you drill down into the specs, there's a difference. The iPhone 16 Pro has a camera with an f/1.78 aperture, while the iPhone 16 and 16e have a camera with an f/1.6 aperture. The iPhone 16e does not have sensor-shift optical image stabilization, while the iPhone 16 does, so it's clear these are different cameras.
According to de With, what Apple has done with the iPhone 16e is pair current-generation image processing enabled by the A18 chip with a smaller, older camera component. With just a single Wide lens, there's no Macro mode, no spatial photo or video capture, no Night mode for Portrait images, and no Cinematic or Action mode options when capturing video. There also aren't pro features like ProRAW.
In an image test compared with the iPhone 16 Pro, the iPhone 16e trended toward warmer images and it had a narrower field of view. The smaller sensor captured less detail, which de With said was most noticeable in lower light. 2x photos with the smaller sensor were lower quality with unpleasant processing.
According to de With, the iPhone 16e isn't on par with the iPhone 16 Pro or even the iPhone 16, but it is on par with prior non-Pro iPhones and the iPhone 14 Pro. The fact that it has no sensor-shift stabilization was the biggest limiting factor because it cuts down on image quality in low light and in night shots.
De With felt that the iPhone 16e's sensor has a grainy, moody sensor that he enjoyed as an alternative to the iPhone 16 Pro's larger sensor. "As the kids would say today, it's a vibe," de With wrote.
iPhones are finally getting a much-requested setting, but availability is limited.
The upcoming iOS 18.4 update introduces an option to set a default navigation app, other than Apple Maps, but unfortunately this new setting is limited to users in the EU. There, you can now set an app like Google Maps or Waze as your default navigation app on the iPhone by opening the Settings app and tapping Apps → Default Apps → Navigation.
Apple, we would love to see this option made available worldwide.
Apple has at least made a small concession for U.S. users, allowing them to set a default translation app on iOS 18.4. For example, you can set Google Translate as your iPhone's default translation app, instead of Apple Translate.
iOS 18.4 is currently in beta testing. The update will be released to the general public in early April, according to Apple's website.
Sonos has ended work on a high-end streaming set-top box that was expected to launch sometime in 2025, reports The Verge. Sonos informed employees of the streaming box's cancelation in a meeting today, and has reassigned those that were working on the product to other teams.
The set-top box was supposed to be Sonos' major product for the second half of 2025, and Sonos spent considerable resources on it. It was almost completed, and was even beta tested for months, but interim CEO Tom Conrad has decided to reprioritize Sonos' roadmap, and a push into video is no longer happening at the current time.
Sonos planned to compete with the Apple TV and other streaming boxes with its now-canceled "Pinewood" project, and the device would have been priced between $200 and $400. It was described as a simple black box with a "beautiful" Android interface that offered content from Netflix, Max, Disney Plus, and other streaming services.
Sonos wanted to reduce fragmentation in the streaming ecosystem, and to distinguish the streaming box from competing products, it would have doubled as an HDMI switch. Users would have been able to plug in gaming consoles, soundbars, and other devices using passthrough functionality, and it is said to have solved a latency problem that long annoyed Sonos.
The new Mac Studio models with M4 Max and M3 Ultra chips support Low Power Mode, according to an Apple support document updated today.
Apple says turning on Low Power Mode reduces the Mac Studio's fan noise, which is useful for tasks that require a quieter environment, and it also allows for reduced power consumption if the computer is left running continuously.
The reduced fan noise aspect of Low Power Mode requires macOS Sequoia 15.1 or later. The new Mac Studio ships with macOS Sequoia 15.3.
A few Reddit users said that macOS Sequoia 15.3 enabled Low Power Mode on the previous-generation 2023 Mac Studio with the M2 Max chip, and presumably on M2 Ultra configurations too. This is not reflected in Apple's support document. (Update: Following our report, Apple revised its support document to confirm that the 2023 Mac Studio indeed supports Low Power Mode, starting with macOS Sequoia 15.3).
In any case, Low Power Mode on the Mac Studio is fairly new.
As obvious as it may sound, Apple's support document also confirms that the Mac Studio still lacks High Power Mode for additional cooling.
Apple's document has a list of Macs that support Low Power Mode with reduced fan noise.
Apple refreshed the MacBook Air lineup last week, and those new models are available starting today. We picked up one of the M4 MacBook Air models for a quick unboxing and first impressions overview.
If you've seen the M2 or M3 MacBook Air models, then you know exactly what the M4 version looks like. Apple didn't change the design one bit, though there is a new Sky Blue color that replaces Space Gray. It's a subtle blue that doesn't even look blue depending on the lighting, so it's not the most exciting update.
What's new is inside, and it's primarily the M4 chip. The M4 chip is Apple's latest, and you don't need us to tell you that it's fast. CPU performance is up to 30 percent faster, and GPU performance is up to 21 percent faster compared to the M3.
Both the M3 and the M4 are built on a 3-nanometer process, so there isn't a huge year-over-year improvement, but the new MacBook Air models weren't designed for people coming from M3. If you're upgrading from an Intel-based Mac, a Windows PC, or even the M1 MacBook Air from 2020, you're going to see a night and day leap in performance.
You can get the MacBook Air in 13-inch and 15-inch sizes, and they're about identical except for the display size, the weight, the speaker system, and the cost. There aren't differences in battery life, and both last for up to 18 hours when streaming video or 15 hours when browsing the web, so you can work all day without needing a charge.
There are two Thunderbolt 4 ports for connecting peripherals, and this year, the MacBook Air can drive two external displays at 6K resolution at 60Hz with no compromises. Apple added a new 12-megapixel front-facing camera this year, and it's a huge improvement over the 1080p camera that's been in multiple generations of prior MacBook Air models. The camera supports the latest features like Center Stage for keeping you in frame and Desk View if you need to demonstrate something on your desk.
The 13-inch MacBook Air is priced at $999 and it comes with 16GB RAM, an 8-core GPU, and a 10-core CPU. If you want the larger screen size, the 15-inch MacBook Air starts with 16GB RAM, a 10-core GPU, and 10-core CPU. You can upgrade the 13-inch MacBook Air to the 10-core GPU, and both models support up to 32GB RAM if you want to improve performance for tasks like video editing, gaming, and AI.
While the MacBook Air only got an incremental update this year, it's still the best Mac for most people. The $999 model is a solid deal with the M4 chip and the 16GB RAM. You can't get a cheaper current-generation notebook from Apple, but if you don't need portability, you can get a Mac mini with about the same specs for $599.
The main compromise between the MacBook Air and the more expensive MacBook Pro is essentially the display. The MacBook Pro has a much brighter mini-LED display that supports HDR and ProMotion. It also has more ports, a longer battery life, and the option to upgrade to faster M4 Pro or M4 Max chips for those who need even more performance.
It's probably going to be a few more years before Apple makes any notable design changes to the MacBook Air, so it's not a bad time to upgrade from an older Intel or M1 MacBook Air model.
Apple supply chain analyst Ming-Chi Kuo today reiterated his belief that a new HomePod with a screen will enter mass production in the third quarter of 2025.
Kuo is likely referring to Apple's rumored smart home hub, which is expected to have a square iPad-like screen that can be attached to a HomePod-like speaker base, or mounted on a wall. If his timeframe is accurate, it means that the device would enter mass production after Apple's annual developers conference WWDC in June.
Kuo originally predicted that the HomePod with a screen would enter mass production in the first quarter of 2025, but he said manufacturing was pushed back due to "software development issues," including Apple Intelligence. Last week, Apple said that the more personalized version of Siri that it previewed at WWDC 2024 last year is taking longer than it expected, and it now anticipates rolling out the new Siri features "in the coming year." It would make sense if Apple's smart home hub has been postponed too, as a result.
Kuo said another reason for the delay is ensuring that the device's interface aligns with software updates coming later this year, including iOS 19. Maybe (or maybe not) this relates to Apple's rumored visionOS-like software redesign plans, which could extend to the all-new homeOS operating system that is expected on the smart home hub.
Apple's smart home hub is rumored to feature a 6-inch or 7-inch display, and an A18 chip. It would allow users to control smart home accessories, make FaceTime video calls, use Apple's intercom feature between rooms in a house, and more. It might even double as a home security system with an Apple-designed camera.
It is unclear if the home hub will launch in late 2025, or if the delays will push it back until 2026.
Today we're tracking a handful of Apple accessory discounts on Amazon, including all-time low prices for both the Apple Pencil Pro and AirTag 4-Pack. Neither deal requires a coupon code this time around, as both have been applied automatically by Amazon.
Note: MacRumors is an affiliate partner with some of these vendors. When you click a link and make a purchase, we may receive a small payment, which helps us keep the site running.
Starting with the AirTag 4-Pack, you can get this accessory for $64.49, down from $99.00. This is an all-time low price, and you can find the 1-Pack on sale as well on Amazon, available for $22.99, down from $29.00.
Secondly, Amazon has the Apple Pencil Pro for $99.00, down from $129.00. This is a match for the record low price on the Apple Pencil Pro, and it's a deal that doesn't typically stick around long on Amazon, so if you've been waiting for it to return, be sure to check it out soon.
If you're on the hunt for more discounts, be sure to visit our Apple Deals roundup where we recap the best Apple-related bargains of the past week.
Deals Newsletter
Interested in hearing more about the best deals you can find in 2025? Sign up for our Deals Newsletter and we'll keep you updated so you don't miss the biggest deals of the season!
Money can buy an ultra-fast Mac, but it cannot buy ultra-fast delivery, apparently.
Apple's new Mac Studio with M4 Max and M3 Ultra chip options began arriving to customers today, but the highest-end model is facing delays.
If you order a maxed-out Mac Studio with a 32-core M3 Ultra chip, 512GB of unified RAM, and 16TB of SSD storage on Apple's online store today, the mind-boggling $14,099 configuration will not arrive until late March. Unsurprisingly, it is the massive 512GB of RAM upgrade option that seems to be causing the longer wait here.
If ordered today, that configuration is estimated for delivery between March 26 and March 31, so there is currently a two- to three-week wait.
Apple plans to release a new Studio Display in late 2025 or early 2026, according to Ross Young, a display industry expert and VP at Counterpoint Research.
In a subscriber-only post shared on X last month, Young said the new Studio Display will feature the same 27-inch screen size as the current model, but add mini-LED backlighting. This upgrade would result in increased brightness and higher contrast ratio compared to the current model, which has traditional LED backlighting.
Young did not share any further details, so it is unclear if any other Studio Display specifications would change, such as the refresh rate.
Apple released the Studio Display in March 2022, alongside the first Mac Studio. The standalone display features a 27-inch LCD screen with a 5K resolution, a 60Hz refresh rate, up to 600 nits brightness, a built-in camera and speakers, one Thunderbolt 3 port, and three USB-C ports. In the U.S., the monitor starts at $1,599.
In November 2024, an anonymous listener of the Relay FM tech podcast "Upgrade" claimed that Apple was developing 90Hz display technology that could be used for the next Studio Display. This higher refresh rate would make content like videos and text while scrolling look smoother to the eye, but 90Hz would stop short of the 120Hz refresh rate that iPhones and Macs with ProMotion support can achieve. It is not clear to us if this individual has any established track record with Apple-related rumors, so keep that in mind.
Young has a pretty good track record with display-related information for future Apple products. For example, he was the first source to reveal the iPhone 16 Pro and iPhone 16 Pro Max would feature 6.3-inch and 6.9-inch displays, respectively, over a year before the devices launched. He is the founder and former CEO of Display Supply Chain Consultants, a research firm that was acquired by Counterpoint Research in late 2023.
Apple's new M4 MacBook Air launches today, and Amazon has launch day discounts worth $50 across nearly every model. You'll need to clip an on-page coupon in order to see these deal prices at checkout, and Best Buy is matching many of these deals if you're a My Best Buy Plus/Total member.
Note: MacRumors is an affiliate partner with Amazon and Best Buy. When you click a link and make a purchase, we may receive a small payment, which helps us keep the site running.
13-Inch M4 MacBook Air
Starting with the 13-inch models, Amazon has $50 off all three of the new configurations of this notebook. Prices start at $949.00 for the 256GB model, then raise to $1,149.00 for the 16GB/256GB model and $1,349.00 for the 24GB/512GB model. Best Buy is matching these deals for members.
Note: You won't see the deal price until checkout.
Moving to the larger display models, Amazon has both 512GB versions of the 15-inch M4 MacBook Air on sale for launch day. The 16GB/512GB model is available for $1,349.00 and the 24GB/512GB model is on sale for $1,549.00, both $50 discounts.
Note: You won't see the deal price until checkout.
The only new M4 MacBook Air that Amazon does not have a discount for is the 256GB 15-inch MacBook Air, so if that's the one you're shopping for you'll need to look at Best Buy. At that retailer, My Best Buy Plus/Total members can get the computer for $1,149.00, down from $1,199.00.
If you're on the hunt for more discounts, be sure to visit our Apple Deals roundup where we recap the best Apple-related bargains of the past week.
Deals Newsletter
Interested in hearing more about the best deals you can find in 2025? Sign up for our Deals Newsletter and we'll keep you updated so you don't miss the biggest deals of the season!
In a statement last week, Apple confirmed that it needed more time to finish developing the new Siri features. Apple said it aimed to begin rolling out the features "in the coming year," but it did not provide a more specific timeframe.
Apple's full statement:
Siri helps our users find what they need and get things done quickly, and in just the past six months, we've made Siri more conversational, introduced new features like type to Siri and product knowledge, and added an integration with ChatGPT. We've also been working on a more personalized Siri, giving it more awareness of your personal context, as well as the ability to take action for you within and across your apps. It's going to take us longer than we thought to deliver on these features and we anticipate rolling them out in the coming year.
Our best guess is that the personalized Siri will launch at some point between iOS 19 in September 2025 and iOS 19.4 in March 2026.
Whenever they launch, the Siri upgrades will include understanding of a user's personal context, on-screen awareness, and deeper per-app controls. For example, during its WWDC 2024 keynote, Apple showed an iPhone user asking Siri about their mother's flight and lunch reservation plans based on info from the Mail and Messages apps.
The new capabilities will be powered by Apple Intelligence, so you will need an iPhone 15 Pro, iPhone 15 Pro Max, iPhone 16e, iPhone 16, iPhone 16 Plus, iPhone 16 Pro, iPhone 16 Pro Max, or any of the iPhone 17 models coming later this year.
 Note: MacRumors is an affiliate partner with Amazon. When you click a link and make a purchase, we may receive a small payment, which helps us keep the site running.


 Note: MacRumors is an affiliate partner with some of these vendors. When you click a link and make a purchase, we may receive a small payment, which helps us keep the site running.


 Note: MacRumors is an affiliate partner with Amazon and Best Buy. When you click a link and make a purchase, we may receive a small payment, which helps us keep the site running.