Did you know that you can manage multiple timers on your HomePod directly from the Home app on iPhone and iPad? Keep reading to learn how.

Ever since iOS 12, HomePod users have been able to set timers, but previously this was only possible via Siri voice commands and there was no app interface for managing them. These days, however, you can set and manage times in the Home interface. Here's how.
- Launch the Home app on your iPhone or iPad.
- Tap a HomePod card.
- To set a new timer, scroll down below "Alarms" and select New next to "Timers."
- Give your timer an identifying label, e.g. "Pizza."

- Set the hours, minutes, and seconds for your timer, then tap Start.
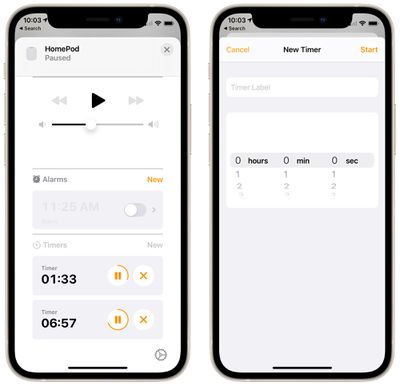
You can set a timer with a maximum timer limit of 24 hours. Any timers you have set on a particular HomePod will appear in this Timers section, and you can pause them or delete them individually using the respective buttons.
You can still set and manage timers via Siri. All you need to say is "Hey Siri, set a timer for [x amount of time]." At any point while the timer is running, you can also ask Siri to turn it off with a command like "Hey Siri, turn off the timer" or "Hey Siri, pause the timer." You can also change the timer countdown with a command like "Hey Siri, change the timer to 10 minutes."
Just be aware that different HomePods aren't aware of timers set on other HomePods, even if they're on the same network.