When macOS Mojave was introduced back in 2018, Apple added Quick Actions to Finder that make it easier to perform quick edits to files without having to open the apps associated with them. In macOS Ventura and later, Apple has expanded what you can do with Quick Actions, making them an even more powerful workflow ally. Here's how to make them work for you.
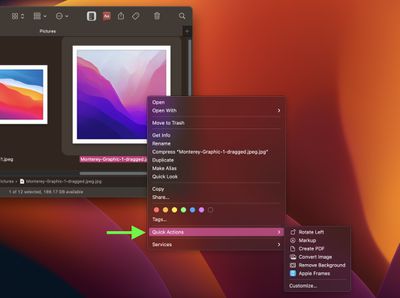
Quick Actions are there to help you perform certain tasks, such as creating a PDF or rotating an image, right from the Finder or your desktop, without opening an app. To access the default Quick Actions in macOS, simply right-click an item in Finder, and hover your cursor over the Quick Actions submenu.
The types of tasks available in the Quick Actions menu (and at the bottom of the Preview pane, if you have it enabled) depend on the file type and any enabled Finder extensions. If it's an image you right-click, for example, the default options include Rotate, Markup, Create PDF, and Remove Background.
How to Customize the Quick Actions menu
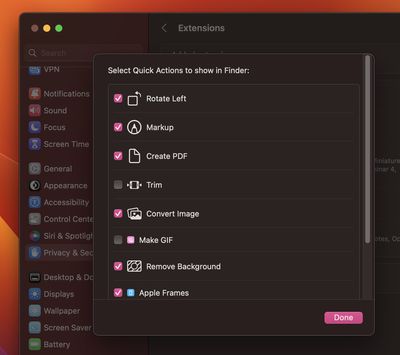
You can also use the Customize... option to select which Quick Actions appear in this menu. Clicking it opens System Settings -> Privacy & Security -> Extensions -> Finder, where you can check boxes alongside a series of Quick Actions to include or exclude them from the right-click menu.
The actions available to you in this list will depend on which applications you have installed and any pre-existing Apple scripts on your Mac. Apple encourages third-party developers to add support for Quick Actions in their apps, but you can also create your own custom ones using the Automator app.
How to Add Shortcuts to the Quick Actions Menu
You can also use the Shortcuts app to add your favorite shortcuts to the Quick Actions menu. The following steps show you how it's done.
- Open the Shortcuts app on your Mac.
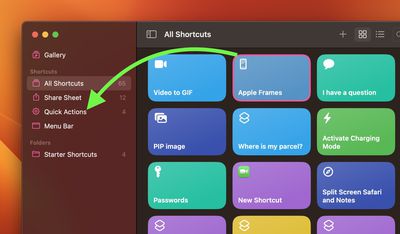
- Click All Shortcuts in the app's sidebar.
- Click-drag a shortcut to the Quick Actions entry in the sidebar. (You can select more than one shortcut by holding Shift, then dragging the selection.)
To make your shortcuts appear in the sidebar, you'll need to check them in the list located in System Settings -> Privacy & Security -> Extensions -> Finder, as explained above.